
OIL PAN
D-6parts diagramREMOVAL / INSPECTION / INSTALLATION
CAUTION
Obtain the code number and deactivate the audio anti-theft system before disconnecting the battery. (Refer to page T-113.)
Oil pan removal / installation
- 1Disconnect the negative battery cable.
- 2Drain the engine oil.
- 3Remove the under cover.
- 4Remove in the order shown in the figure, referring to Removal Note.
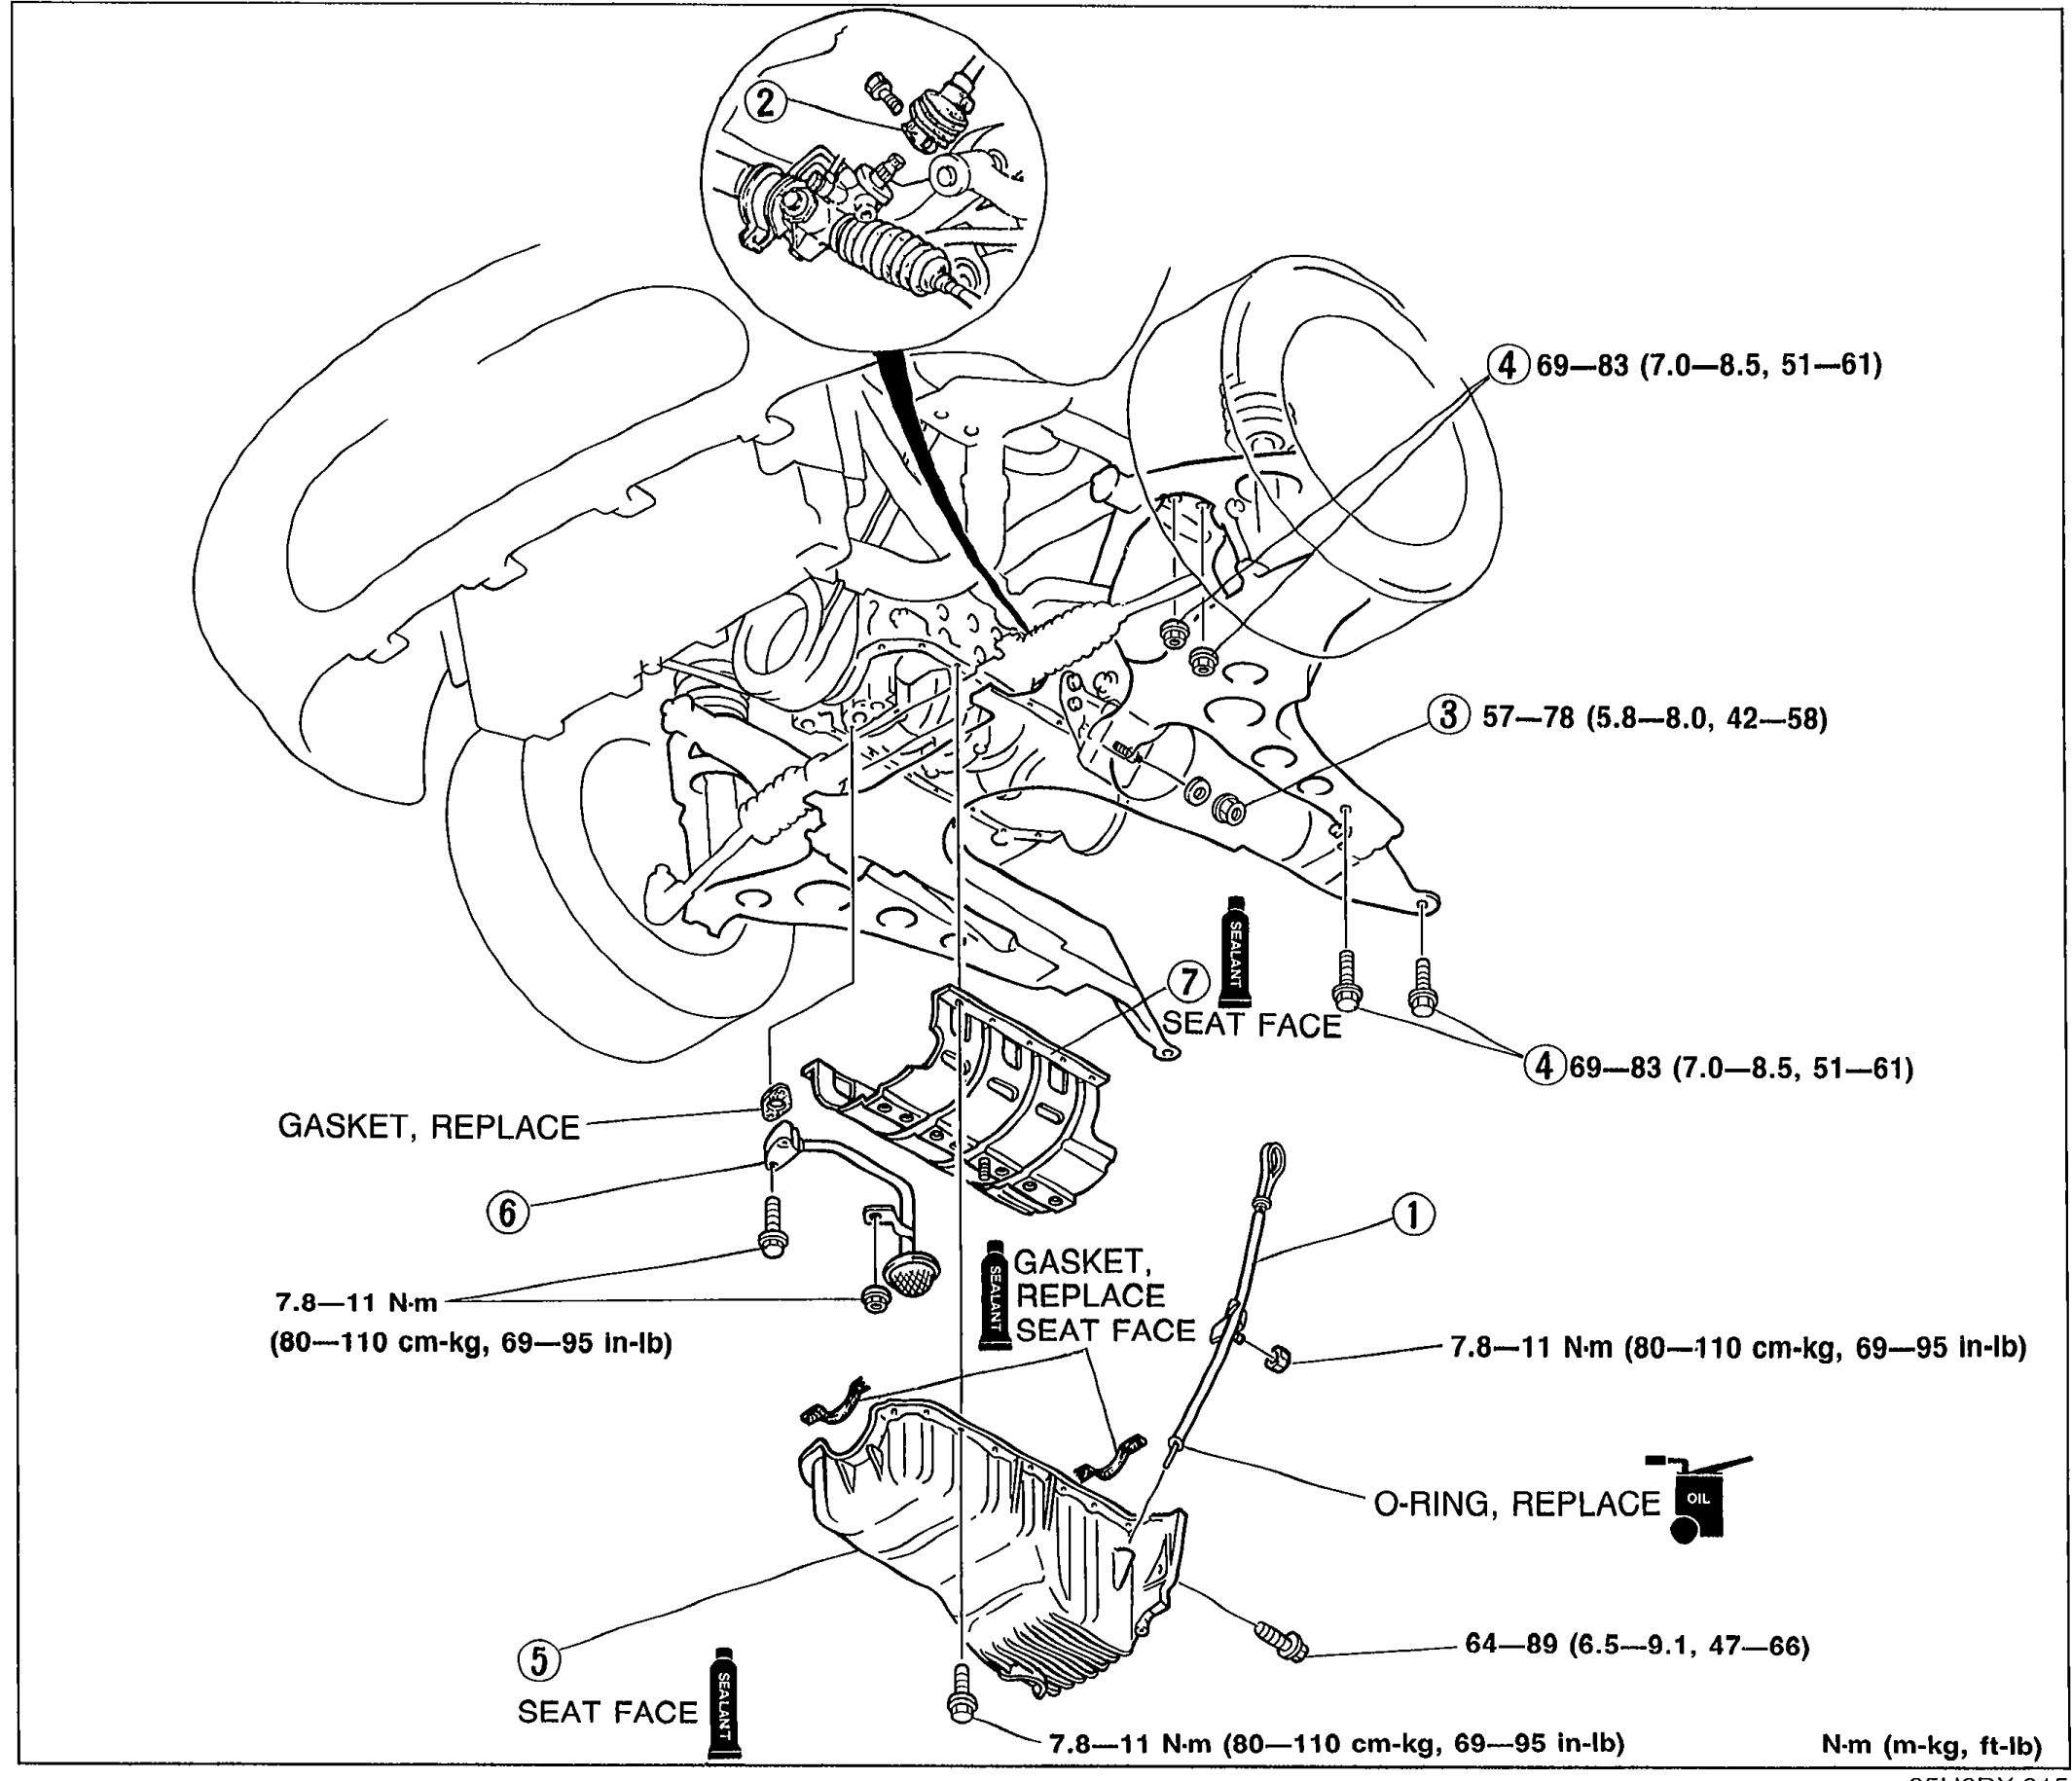 05U0DX-015
 - 5Install in the reverse order of removal, referring to Installation Note.
Parts DiagramFig. fig1
| Specification | Value |
|---|---|
| Tightening torque (callout 4) | 69 - 83N·m |
| Tightening torque (engine mount nut, callout 3) | 57 - 78N·m |
| Tightening torque (oil pan bolts, callout 5) | 7.8 - 11N·m |
| Tightening torque (oil strainer, callout 6) | 7.8 - 11N·m |
| Tightening torque (oil pan baffle, callout 7) | 7.8 - 11N·m |
| Tightening torque (oil level gauge pipe, callout 1) | 64 - 89N·m |
Tightening torque (callout 4)
69 - 83N·m
Tightening torque (engine mount nut, callout 3)
57 - 78N·m
Tightening torque (oil pan bolts, callout 5)
7.8 - 11N·m
Tightening torque (oil strainer, callout 6)
7.8 - 11N·m
Tightening torque (oil pan baffle, callout 7)
7.8 - 11N·m
Tightening torque (oil level gauge pipe, callout 1)
64 - 89N·m
NOTE
GASKET, REPLACE / O-RING, REPLACE / SEAT FACE markers shown in the exploded view.