
DIFFERENTIAL
M-29prose procedurePPF Removal (continued)
- 5Remove the differential mounting spacer.
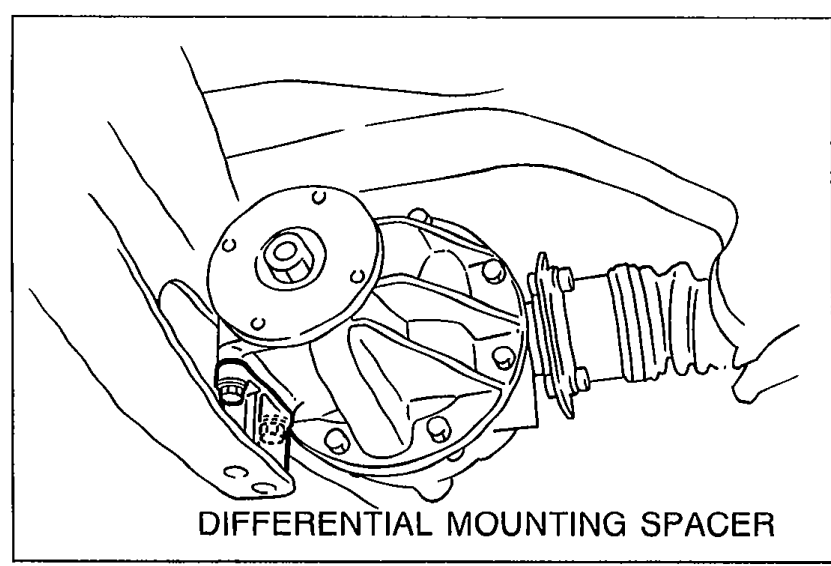 05U0MX-125
 - 6Turn a bolt (M14x1.5) into the sleeve.
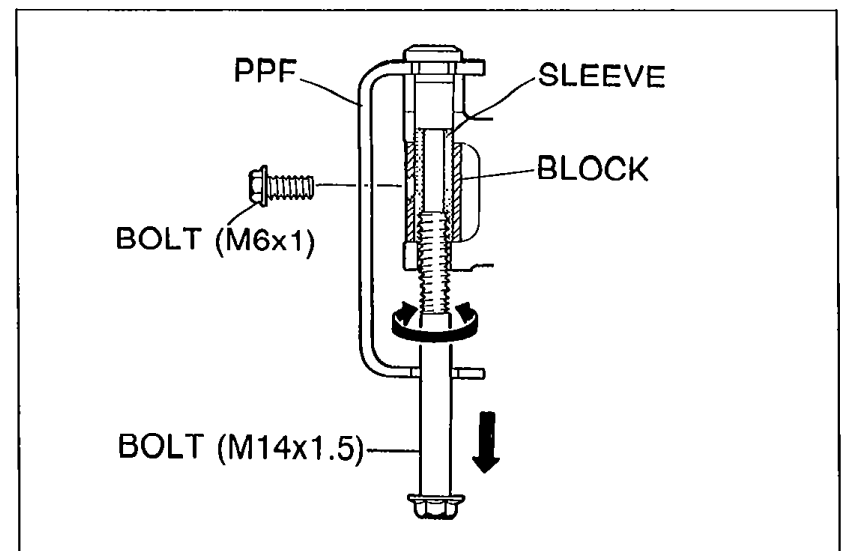 05U0MX-070
 - 7Twist and pull the bolt downward.
- 8Install a bolt (M6x1) into the hole in the block to hold the sleeve, and remove the long bolt (M14x1.5).
- 9Remove the bolt (M6x1).
- 10Remove the transmission-side bolts, and remove the PPF.Do not remove the spacers shown in the figure from the PPF.If they are removed, replace the PPF as an assembly.
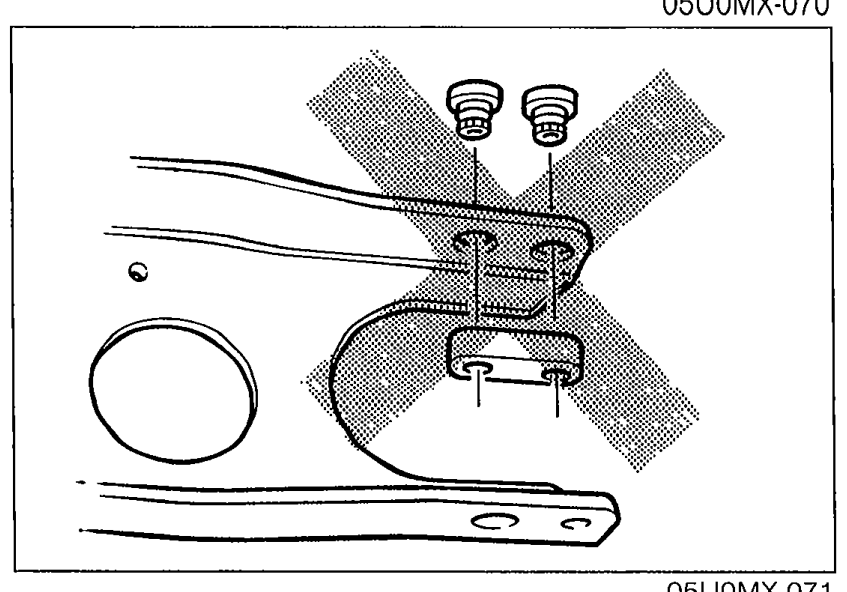 05U0MX-071
Driveshaft
Mark the driveshaft and output shaft for proper installation.
Differential
Differential Removal
- 1Support the differential with a jack.
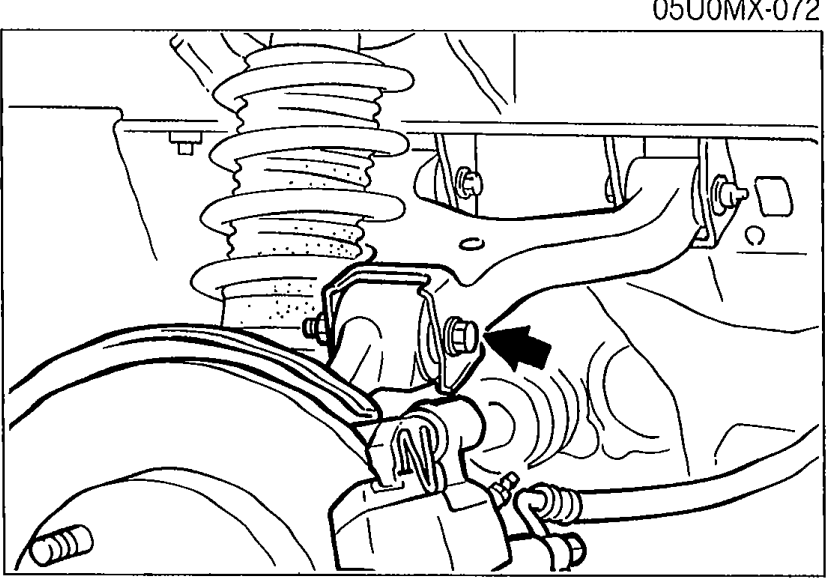 05U0MX-073
 - 2Down and move it forward.If it is difficult to separate the driveshaft from the output shaft, remove one side upper arm installation bolt and nut.
- 3Separate the driveshaft from the output shaft.