
BRAKE SYSTEM
P-14prose procedureLoaded condition
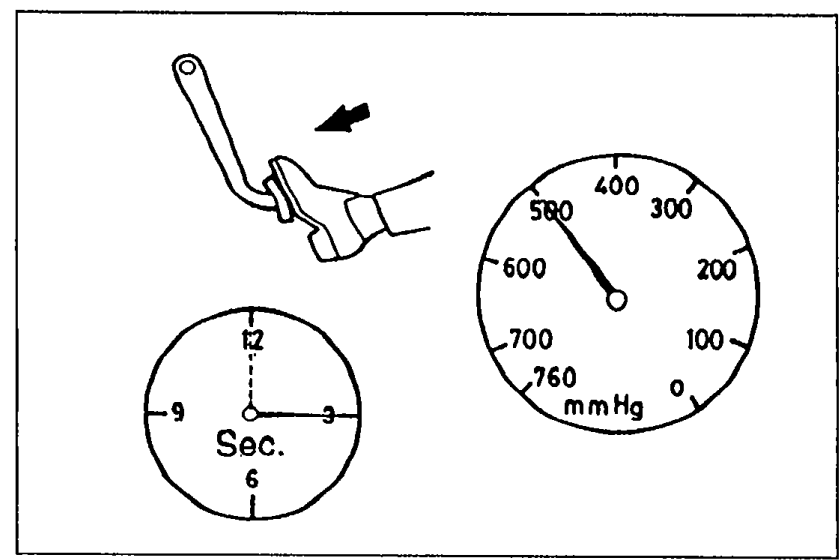
- 1Start the engine.
 05U0PX-025
 - 2Depress the brake pedal with a force of 196 N (20 kg, 44 lb).
- 3With the brake pedal depressed, stop the engine when the vacuum gauge indicates 500 mmHg (19.7 inHg).
- 4Observe the vacuum gauge for 15 seconds. If the gauge indicates 475—500 mmHg (18.7—19.7 inHg), the unit is operating.
b) Checking for hydraulic pressure
1. If with the engine stopped (vacuum 0 mmHg [0 inHg]) the fluid pressure is within specification, the unit is operating.
Hydraulic pressure — engine stopped (vacuum 0 mmHg)
196 N (20 kg, 44 lb)
Fluid pressure1,079—1,177 kPa (11—12 kg/cm², 156—171 psi)
2. Start the engine. Depress the brake pedal when the vacuum reaches 500 mmHg (19.7 inHg). If the fluid pressure is within specification, the unit is operating.
Hydraulic pressure — engine running (vacuum 500 mmHg)
196 N (20 kg, 44 lb)
Fluid pressure5,199—5,494 kPa (53—56 kg/cm², 754—796 psi)
Inspection of check valve
NOTE
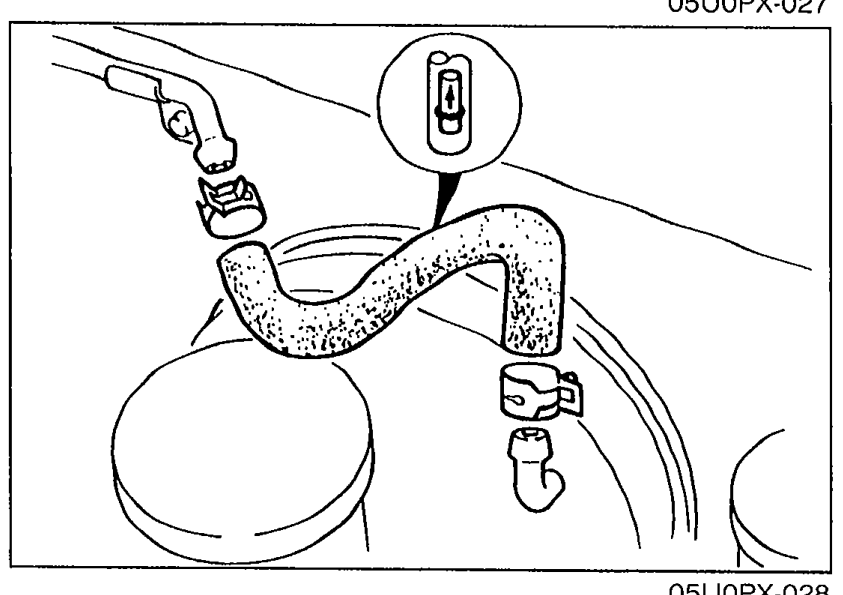
The check valve is pressed into the vacuum hose. There is an arrow on the hose to indicate direction of hose installation.
Inspection
Check valve inspection
- 1Disconnect the vacuum hose from the engine.
 05U0PX-028
 - 2Apply suction and pressure to the hose from the engine side. Verify that air flows only toward the engine. If the air passes in both directions or not at all, replace the vacuum hose (along with the check valve).