Mazda MX-5 NA silhouetteMX-5 NA

BRAKE SYSTEM — REAR BRAKE (DISC)

P-22parts diagram

REAR BRAKE (DISC)

Quick Inspection, On-vehicle

Disc pad

Quick Inspection, On-vehicle — Disc pad

  1. 1
    Jack up the rear of the vehicle and support it with safety stands.
  2. 2
    Remove the wheels.
  3. 3
    Sight through the caliper inspection hole and verify the remaining thickness of the pad.
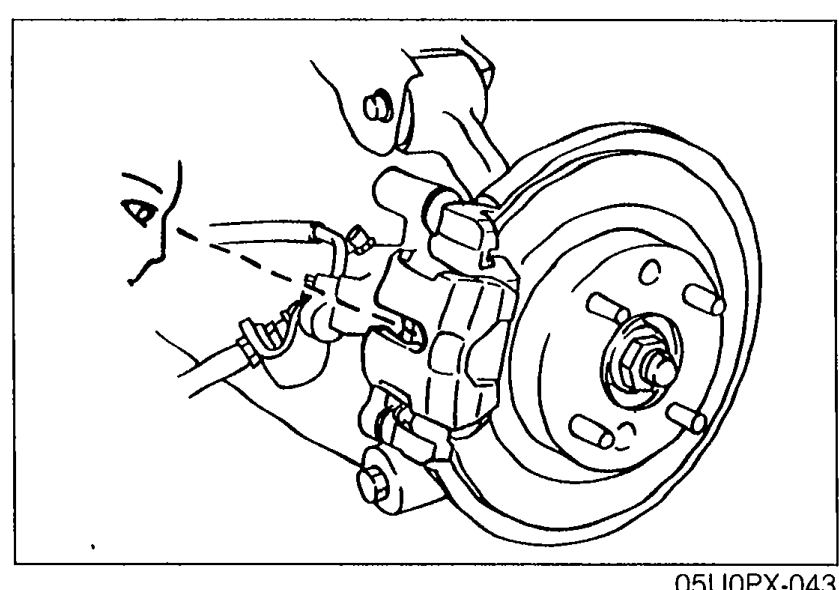
    Illustration of the rear disc brake assembly with the wheel removed, showing the caliper and rotor; the technician sights through the caliper inspection hole (arrow) to gauge remaining pad thickness.
    05U0PX-043
Thicknessmin.
1.0mm (0.04 in)

Replacement

Disc pad

Replacement — Disc pad

  1. 1
    Remove in the order shown in the figure, referring to Removal Note.
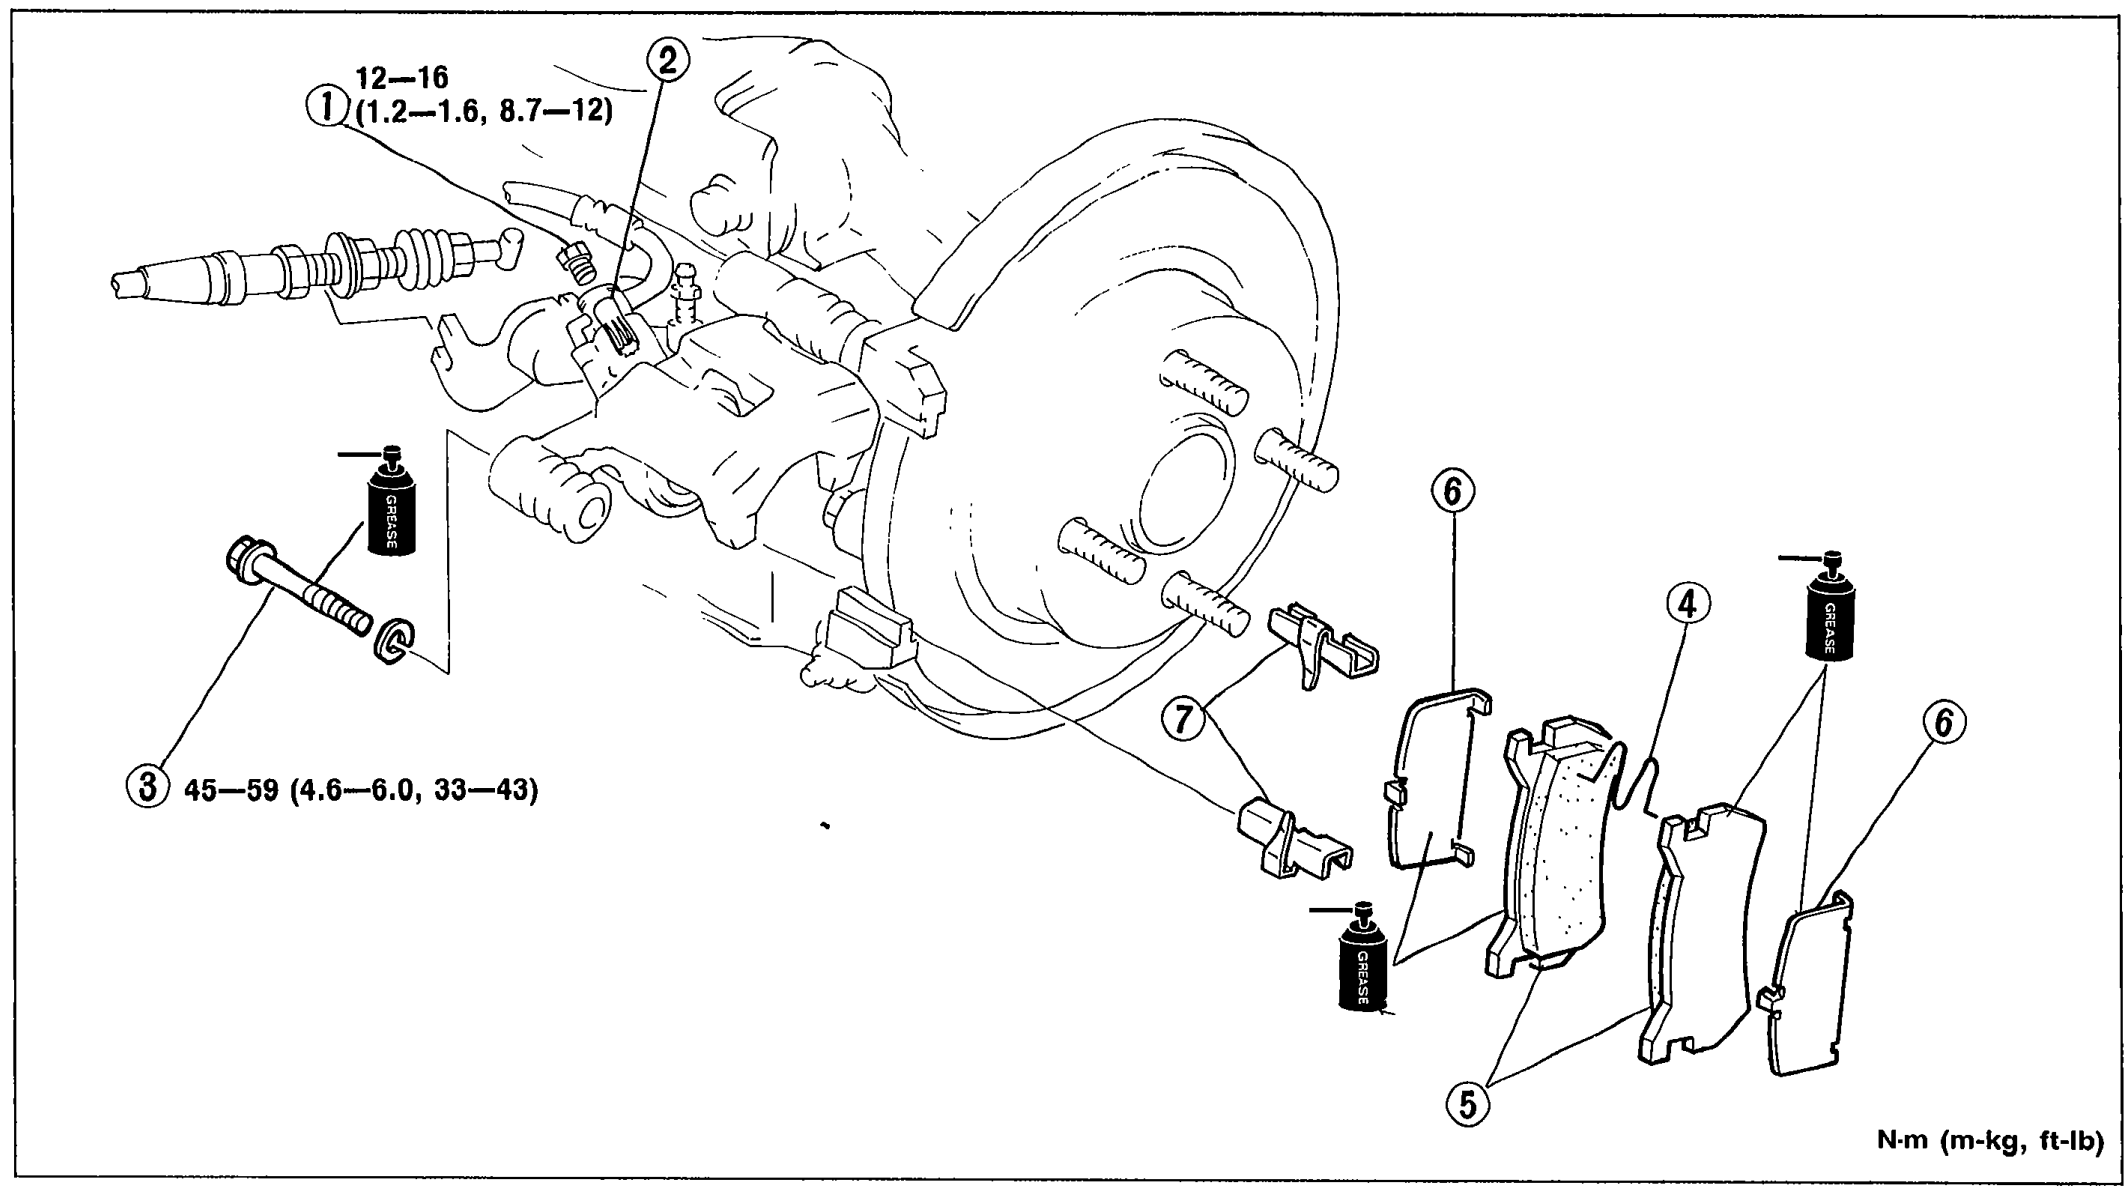
    Exploded view of the rear disc-brake pad replacement. Shows the caliper/rotor assembly with plug (1) with 12—16 N·m torque, manual adjustment gear (2), lock bolt (3) with 45—59 N·m torque, M-spring (4), disc pad (5), shim (6), and guide plate (7). Grease bottle icons indicate apply grease.
    05U0PX-044
  2. 2
    Install in the reverse order of removal, referring to Installation Note.
Parts DiagramFig. fig2
#Part NameNotes
1PlugTightening torque: 12—16 N·m (1.2—1.6 m-kg, 8.7—12 ft-lb)
2Manual adjustment gearRemoval below; Installation page P-23. Apply grease.
3Lock boltTightening torque: 45—59 N·m (4.6—6.0 m-kg, 33—43 ft-lb)
4M-spring
5Disc padInspection page P-24
6ShimApply grease
7Guide plate

Removal note

Manual adjustment gear

Turn the manual adjustment gear counterclockwise with an Allen wrench to pull the brake caliper piston back.

Search Manual

Search pages, specs, and procedures