Mazda MX-5 NA silhouetteMX-5 NA

BRAKE SYSTEM — Installation note / Removal / Installation (Rear Caliper)

P-23parts diagram

Installation note

Manual adjustment

Installation note — Manual adjustment

  1. 1
    Turn the manual adjustment gear clockwise until the brake pads just touch the disc plate.
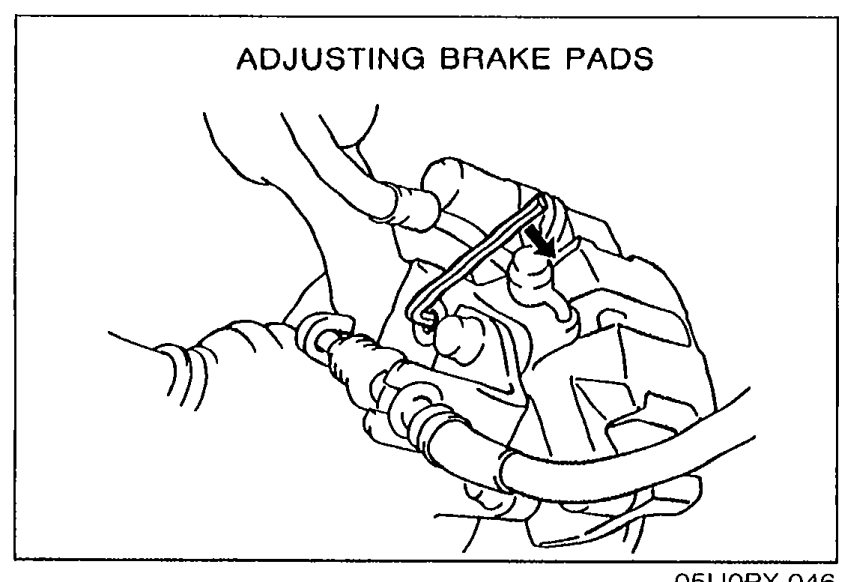
    Illustration titled ADJUSTING BRAKE PADS showing an Allen wrench inserted into the rear caliper's manual adjustment gear to turn it clockwise until the pads contact the disc plate.
    05U0PX-046
  2. 2
    Return the manual adjustment gear counterclockwise 1/3 turn.

Removal / Installation

Caliper

Removal / Installation — Caliper

  1. 1
    Jack up the rear of the vehicle and support it with safety stands.
  2. 2
    Remove the wheels; then remove components in the order shown in the figure.
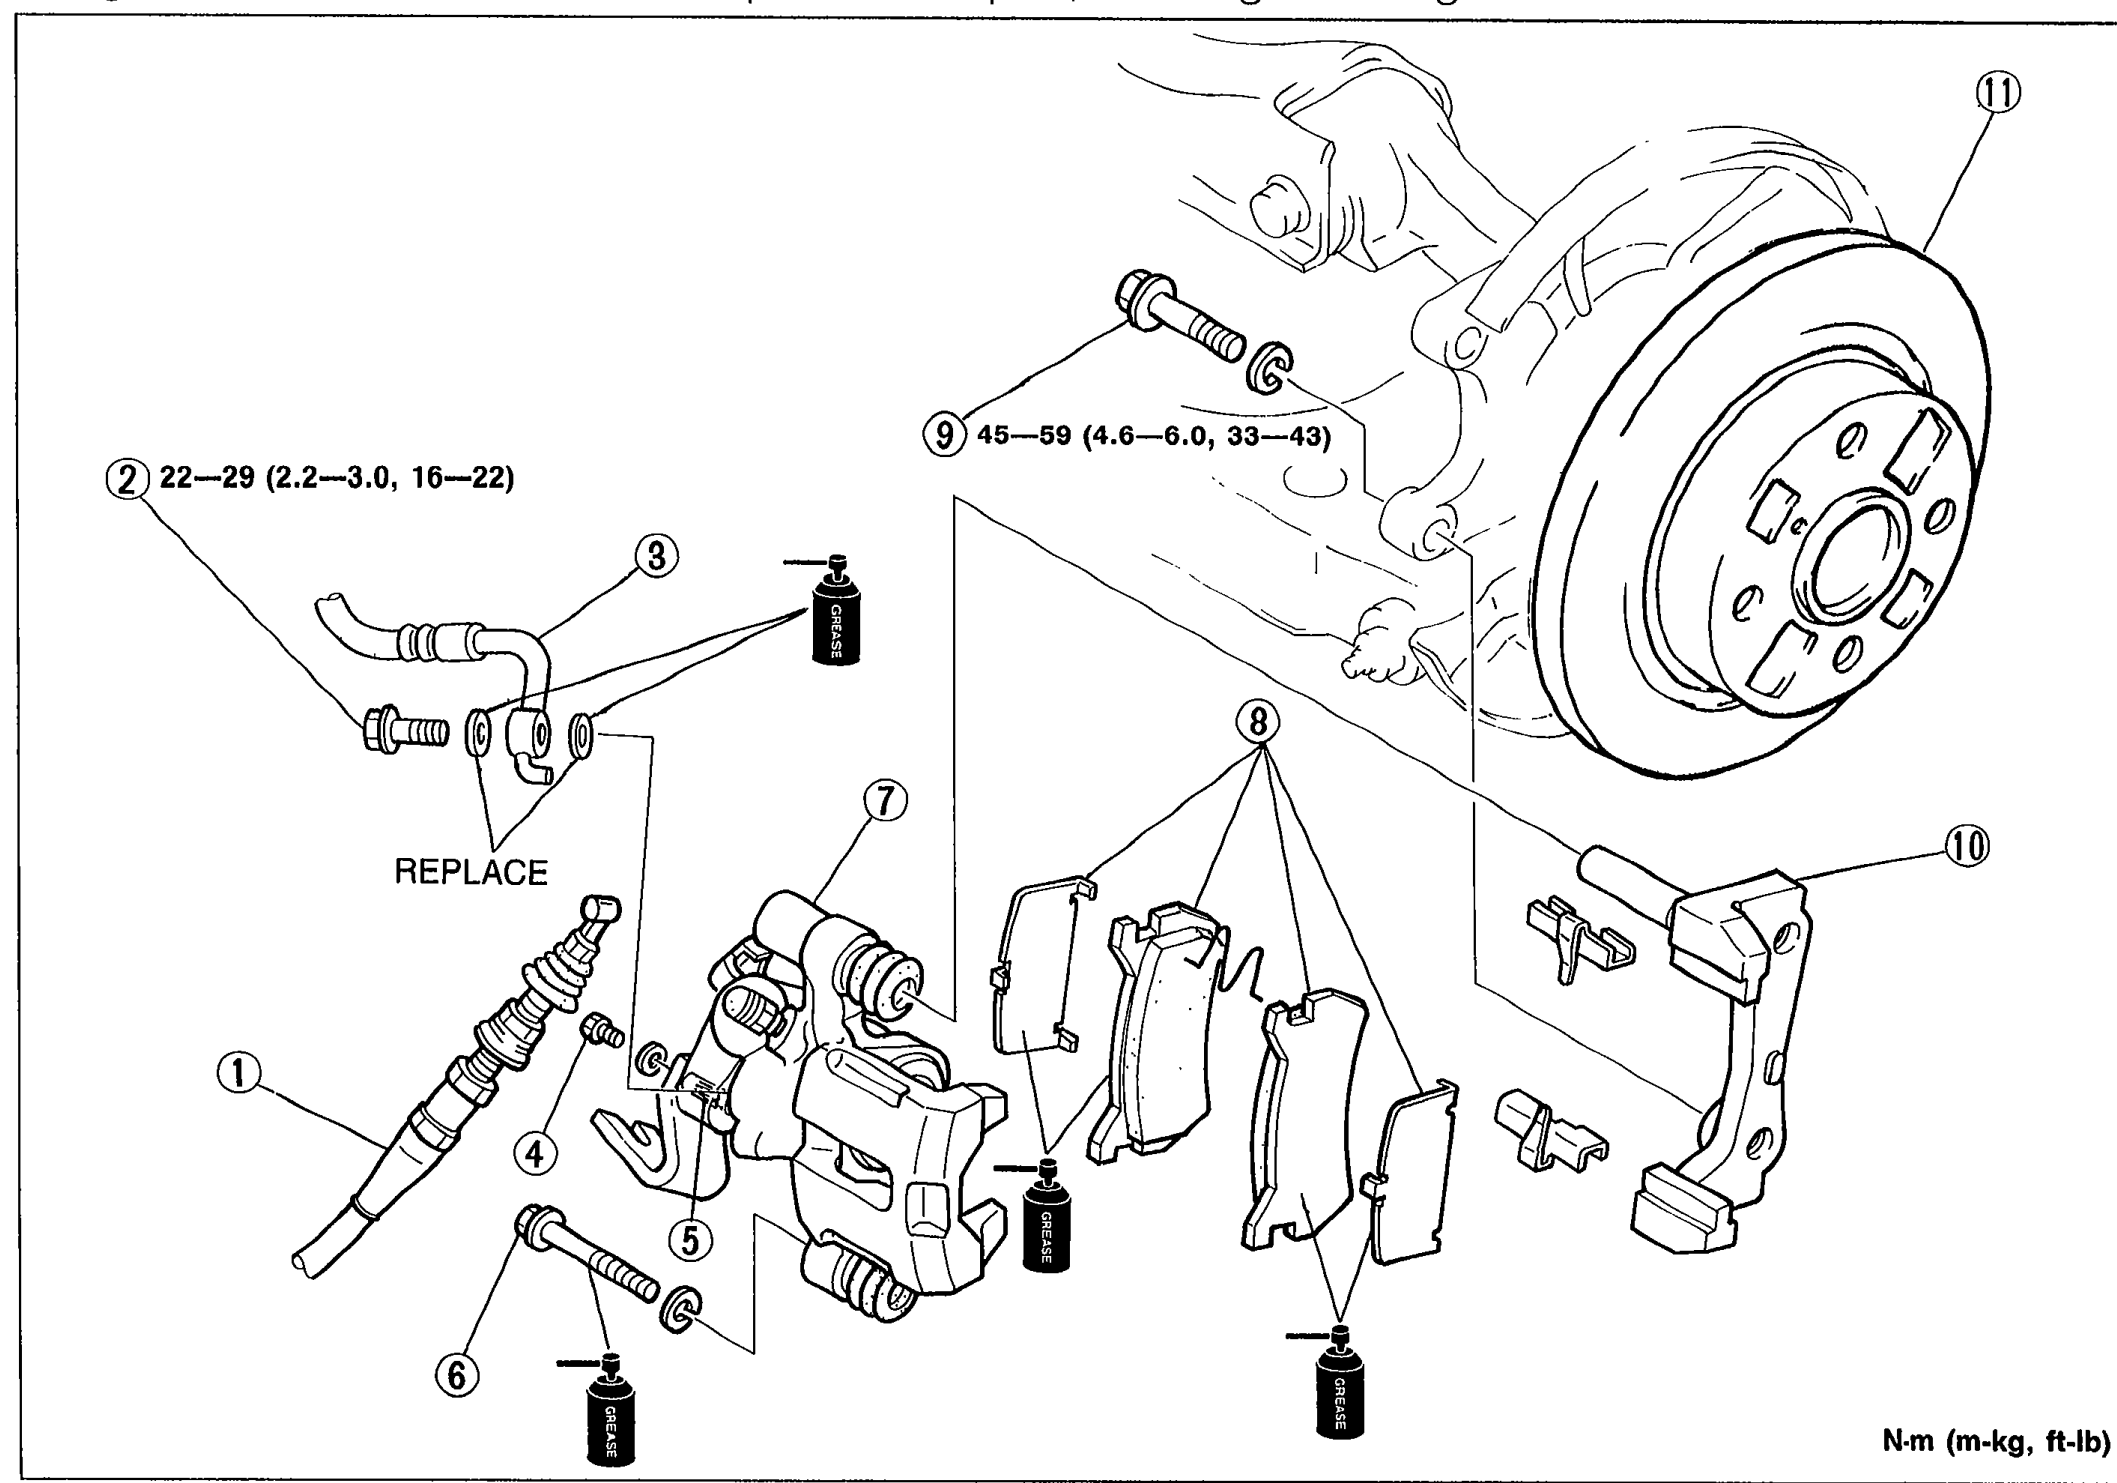
    Exploded view of rear brake caliper removal/installation. Shows parking cable (1), connecting bolt (2) with 22—29 N·m torque, brake hose (3) marked REPLACE, plug (4), manual adjustment gear (5), lock bolt (6) with 45—59 N·m torque, caliper (7), disc pad assembly (8), bolt (9), mounting support (10), and disc plate (11). Grease bottle icons indicate apply grease.
    05U0PX-047
  3. 3
    Install in the reverse order of removal.
  4. 4
    Tighten all nuts and bolts to the specified torques, referring to the figure.
Parts DiagramFig. fig2
#Part NameNotes
1Parking cableRemoval / Inspection / Installation page P-29
2Connecting boltTightening torque: 22—29 N·m (2.2—3.0 m-kg, 16—22 ft-lb)
3Brake hoseREPLACE
4Plug
5Manual adjustment gearRemoval page P-22; Installation page P-23
6Lock boltTightening torque: 45—59 N·m (4.6—6.0 m-kg, 33—43 ft-lb)
7CaliperDisassembly / Assembly page P-25
8Disc pad assemblyReplacement page P-22; Inspection page P-24
9Bolt
10Mounting support
11Disc plateInspection page P-24

Search Manual

Search pages, specs, and procedures