Mazda MX-5 NA silhouetteMX-5 NA

BRAKE SYSTEM — FRONT BRAKE (DISC)

P-18parts diagram

FRONT BRAKE (DISC)

Quick Inspection, On-vehicle

Disc pad

Quick Inspection, On-vehicle — Disc pad

  1. 1
    Jack up the front of the vehicle and support it with safety stands.
  2. 2
    Remove the wheels.
  3. 3
    Sight through the caliper inspection hole and verify the remaining thickness of the pad.
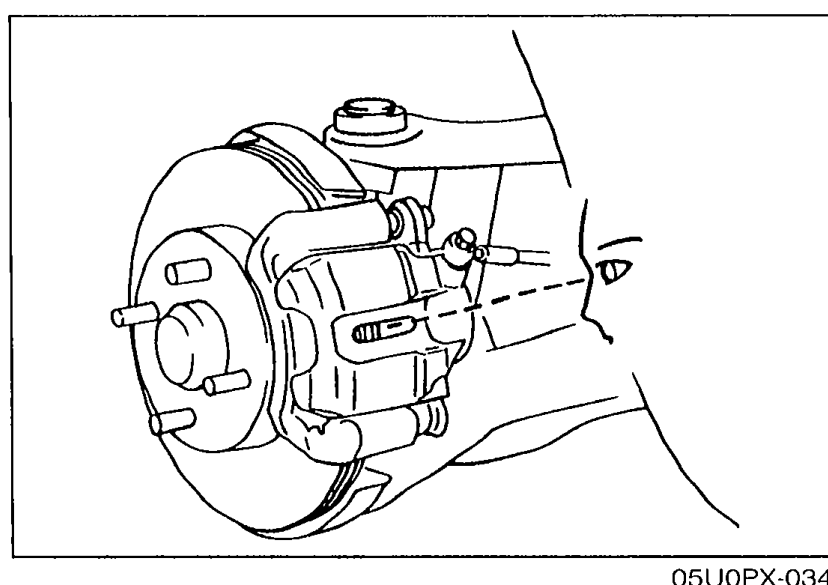
    Photograph of the front disc brake assembly with the wheel removed, showing the caliper, rotor, and inspection hole through which the pad thickness is sighted during quick inspection.
    05U0PX-034
Thicknessmin.
1.0mm (0.04 in)

Replacement

Disc pad

Replacement — Disc pad

  1. 1
    Remove in the order shown in the figure.
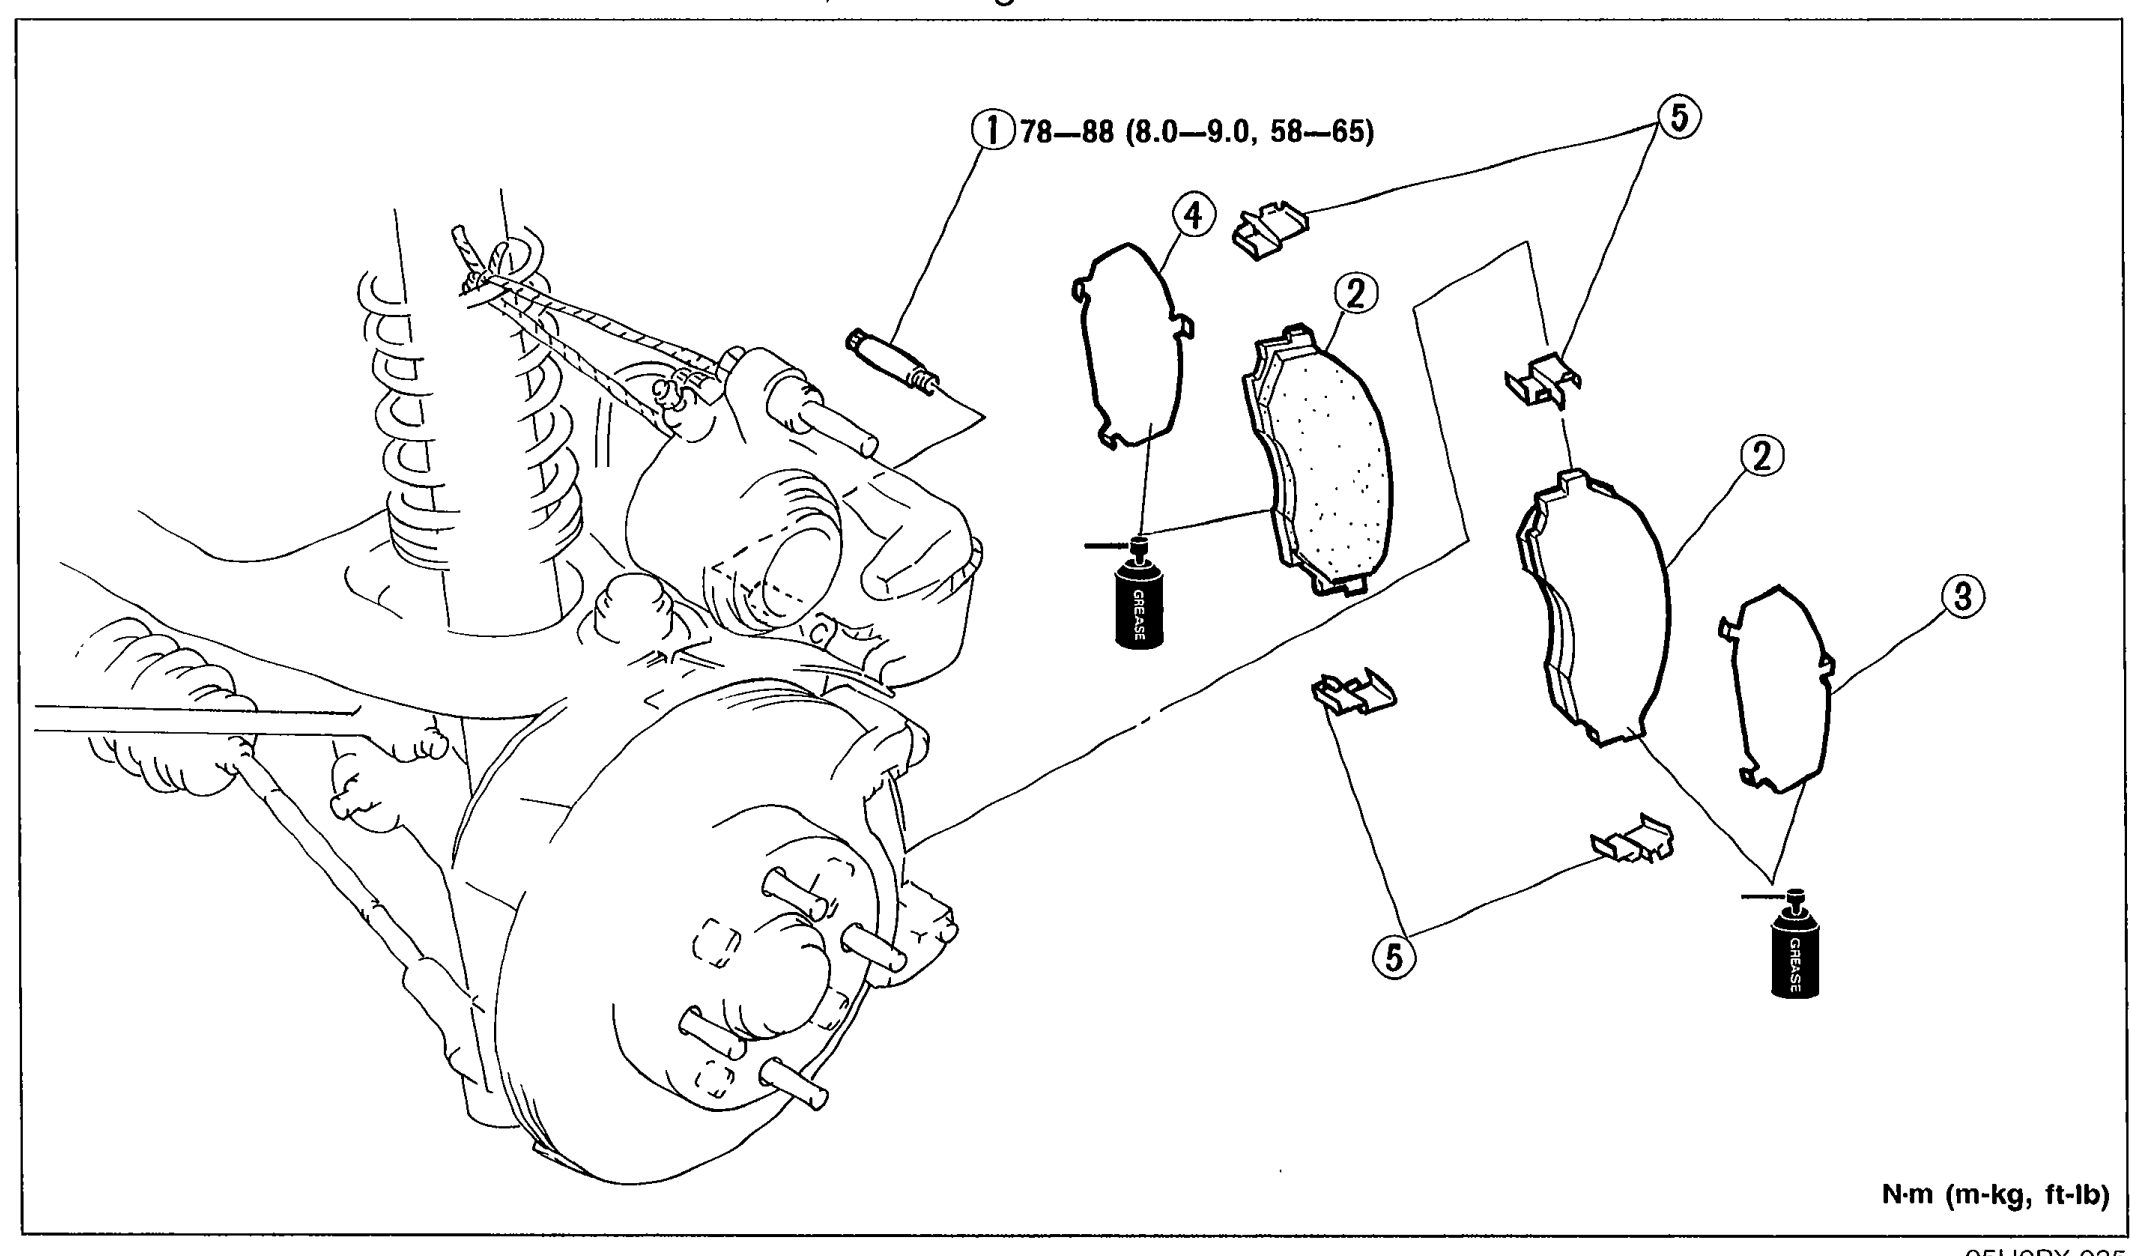
    Exploded view of front disc brake pad replacement. Shows the strut/knuckle/rotor assembly on the left and the caliper hardware on the right: lock bolt (1) with 78—88 N·m torque, disc pad (2), outer shim (3), inner shim (4), and guide plate (5). Two grease/lubricant bottle icons appear next to shims indicating apply grease.
    05U0PX-035
  2. 2
    Install in the reverse order of removal, referring to Installation Note.
Parts DiagramFig. fig2
#Part NameNotes
1Lock boltRemoval page P-18. Tightening torque: 78—88 N·m (8.0—9.0 m-kg, 58—65 ft-lb)
2Disc padInstallation page P-19
3Outer shimApply grease
4Inner shimApply grease
5Guide plate

Removal

Lock bolt

Removal — Lock bolt

  1. 1
    Remove the lower lock bolt.
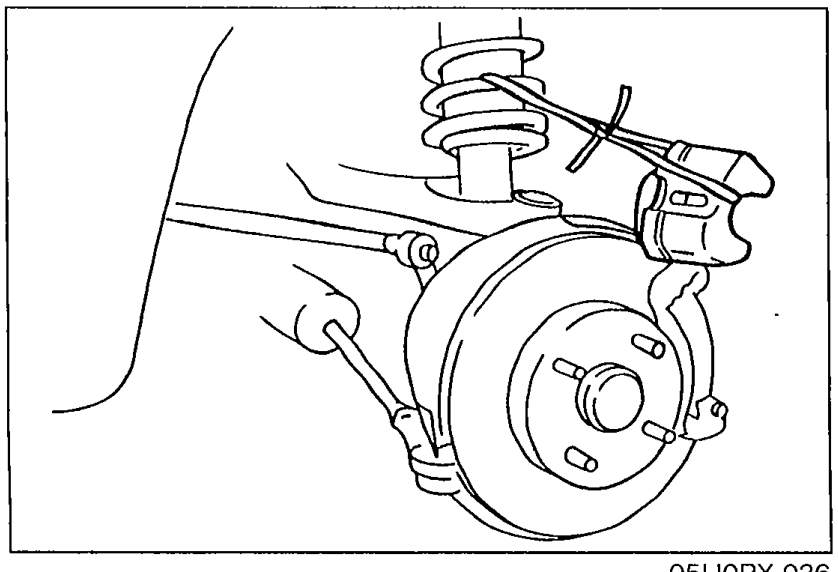
    Photograph of the front strut/knuckle/brake-caliper area showing the caliper rotated upward off the rotor (with lower lock bolt removed) and the rotor exposed for pad removal.
    05U0PX-036
  2. 2
    Rotate the caliper upward and support it with a piece of rope.

Search Manual

Search pages, specs, and procedures