
MOLDING AND GARNISH
S-28prose procedureRemoval Note
Front beltline molding
Front beltline molding removal note
- 1Remove the door mirror. (Refer to page S-30.)
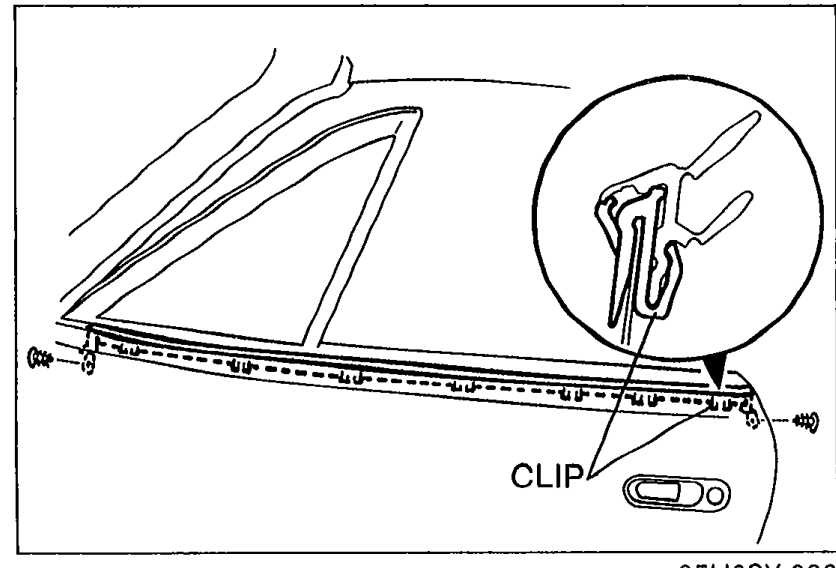
- 2Remove the front beltline molding.Do not damage the body.The clips are where shown in the figure.
 05U0SX-036
CAUTION
Do not damage the body.
NOTE
The clips are where shown in the figure.
Rear finisher
Rear finisher removal note
- 1Remove the rear combination light. (Refer to Section T.)
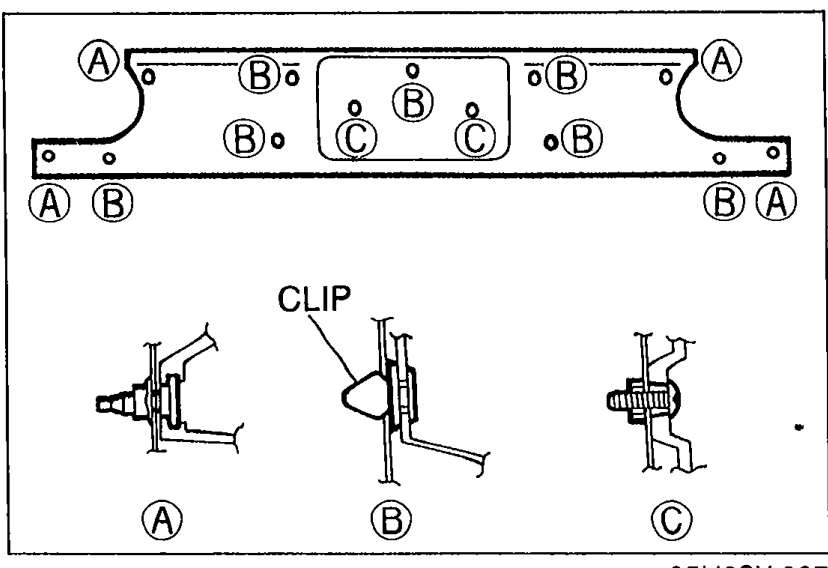
- 2Remove the rear finisher.The clips are where shown in the figure.
 05U0SX-037
NOTE
The clips are where shown in the figure.
Beltline molding
Remove the convertible top for removal of the beltline molding. (Refer to page S-61.)
Installation Note
Windshield molding
Windshield molding installation note
- 1Remove the windshield. (Refer to page S-38.)
- 2Install the windshield. (Refer to page S-38.)
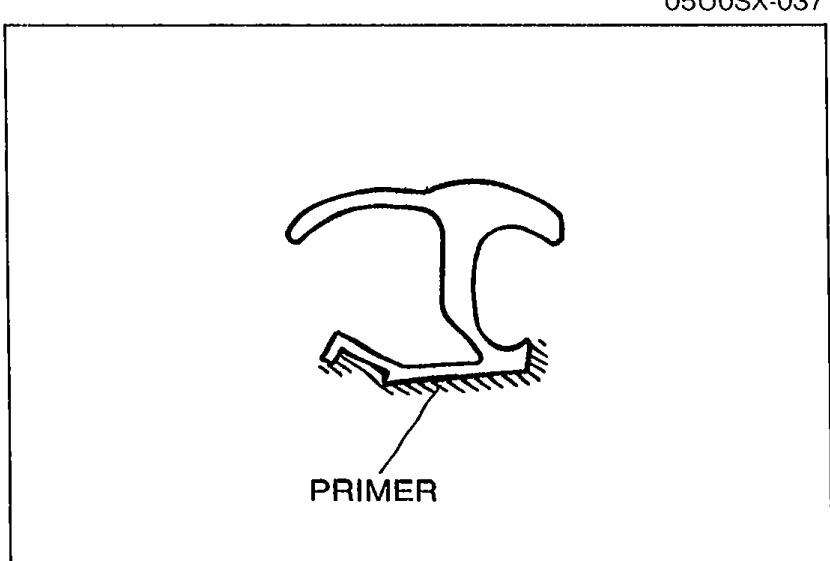
- 3Apply primer with a brush to the bonding area of the new upper molding, and allow it to dry for approx. 30 minutes.Keep the area free of dirt and grease. Do not touch the surface. If primer gets on the skin, remove it immediately.Lower the convertible top to prevent the glass from being pushed out by air pressure if a door is closed.
 05U0SX-038
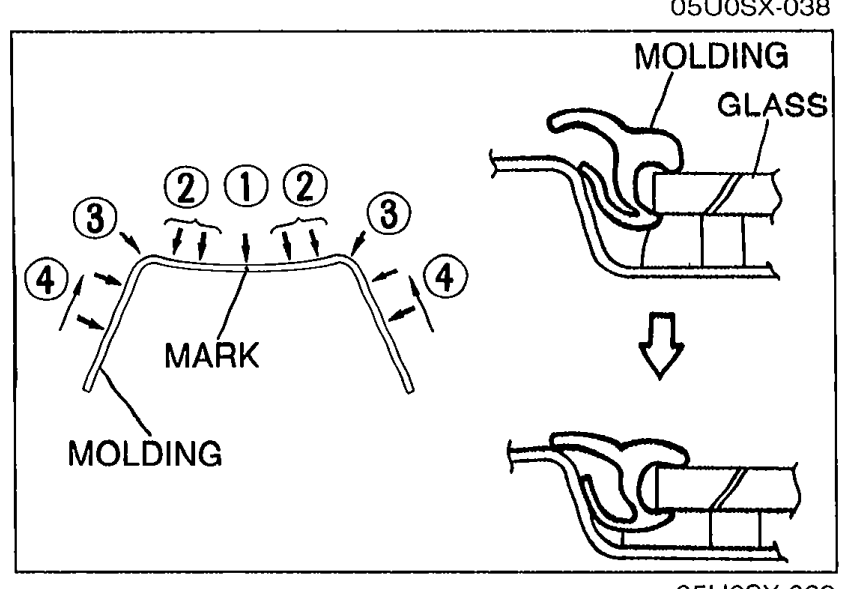
 - 4Align the center mark in the molding with the glass mark (1).
 05U0SX-039
 - 5Install the upper portions of the molding into the body (2).
- 6Push the corner of the molding into the body (3).
- 7Push the side portions of the molding into the body, beginning from the bottom (4).
- 8Check for water leaks. If a leak is found, wipe the water off well and repeat the installation.
CAUTION
Keep the area free of dirt and grease. Do not touch the surface. If primer gets on the skin, remove it immediately.
Lower the convertible top to prevent the glass from being pushed out by air pressure if a door is closed.
Hardening time of repair seal
Hardening time of repair seal
5°C (41°F)
Surface hardening timeApprox. 1.5 hr
Time required until car can be put into service12 hr
20°C (68°F)
Surface hardening timeApprox. 1 hr
Time required until car can be put into service4 hr
35°C (95°F)
Surface hardening timeApprox. 10 min
Time required until car can be put into service2 hr