
MOLDING AND GARNISH
S-29prose procedureSection applies only to vehicles with the detachable hard top option.
Rear window molding (Detachable hard top)
Rear window molding installation (Detachable hard top)
- 1Remove the rear window glass. (Refer to page S-42.)
- 2Install the rear window glass. (Refer to page S-42.)
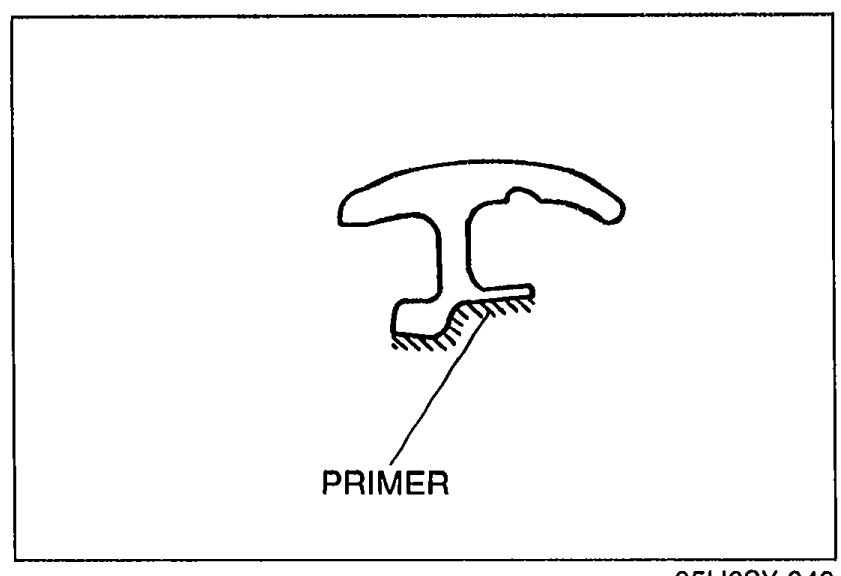
- 3Apply primer with a brush to the bonding area of the new rear window molding, and allow it to dry for approx. 30 minutes.Keep the area free of dirt and grease. Do not touch the surface. If primer gets on the hand, remove it immediately.
 05U0SX-040
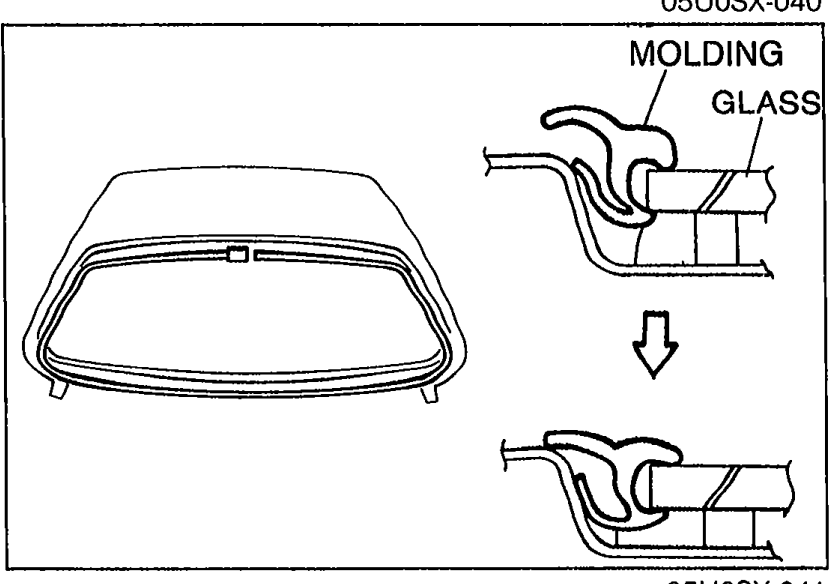
 - 4Install the rear window molding to the glass, as shown.
 05U0SX-041
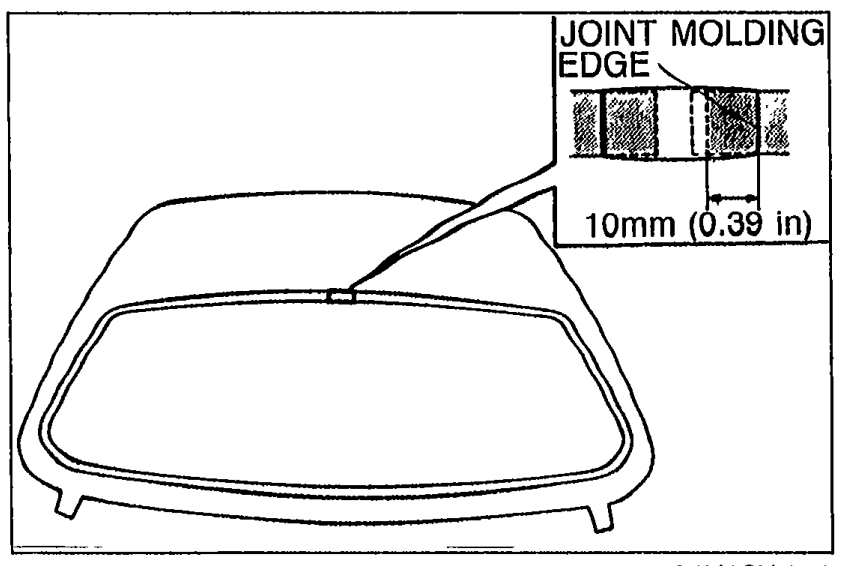
 - 5If the molding is too long, cut the excess molding 10mm (0.39 in) inside the joint molding edge.
 05U0SX-042
 - 6Check for water leaks. If a leak is found, wipe the water off well and repeat the installation.
CAUTION
Keep the area free of dirt and grease. Do not touch the surface. If primer gets on the hand, remove it immediately.
Hardening time of repair seal
Hardening time of repair seal
5°C (41°F)
Surface hardening timeApprox. 1.5 hr
Time required until car can be put into service12 hr
20°C (68°F)
Surface hardening timeApprox. 1 hr
Time required until car can be put into service4 hr
35°C (95°F)
Surface hardening timeApprox. 10 min
Time required until car can be put into service2 hr