
AIR CONDITIONER
U-38parts diagramCONDENSER FAN
Removal / Installation
CAUTION
Obtain the code number and deactive the audio anti-theft function before disconnecting the battery cable.
Condenser fan Removal / Installation
- 1Disconnect the negative battery cable.
- 2Disconnect the cooling fan connector.
- 3Remove the bolts and cooling fan.
- 4Remove the condenser fan as shown in the figure.
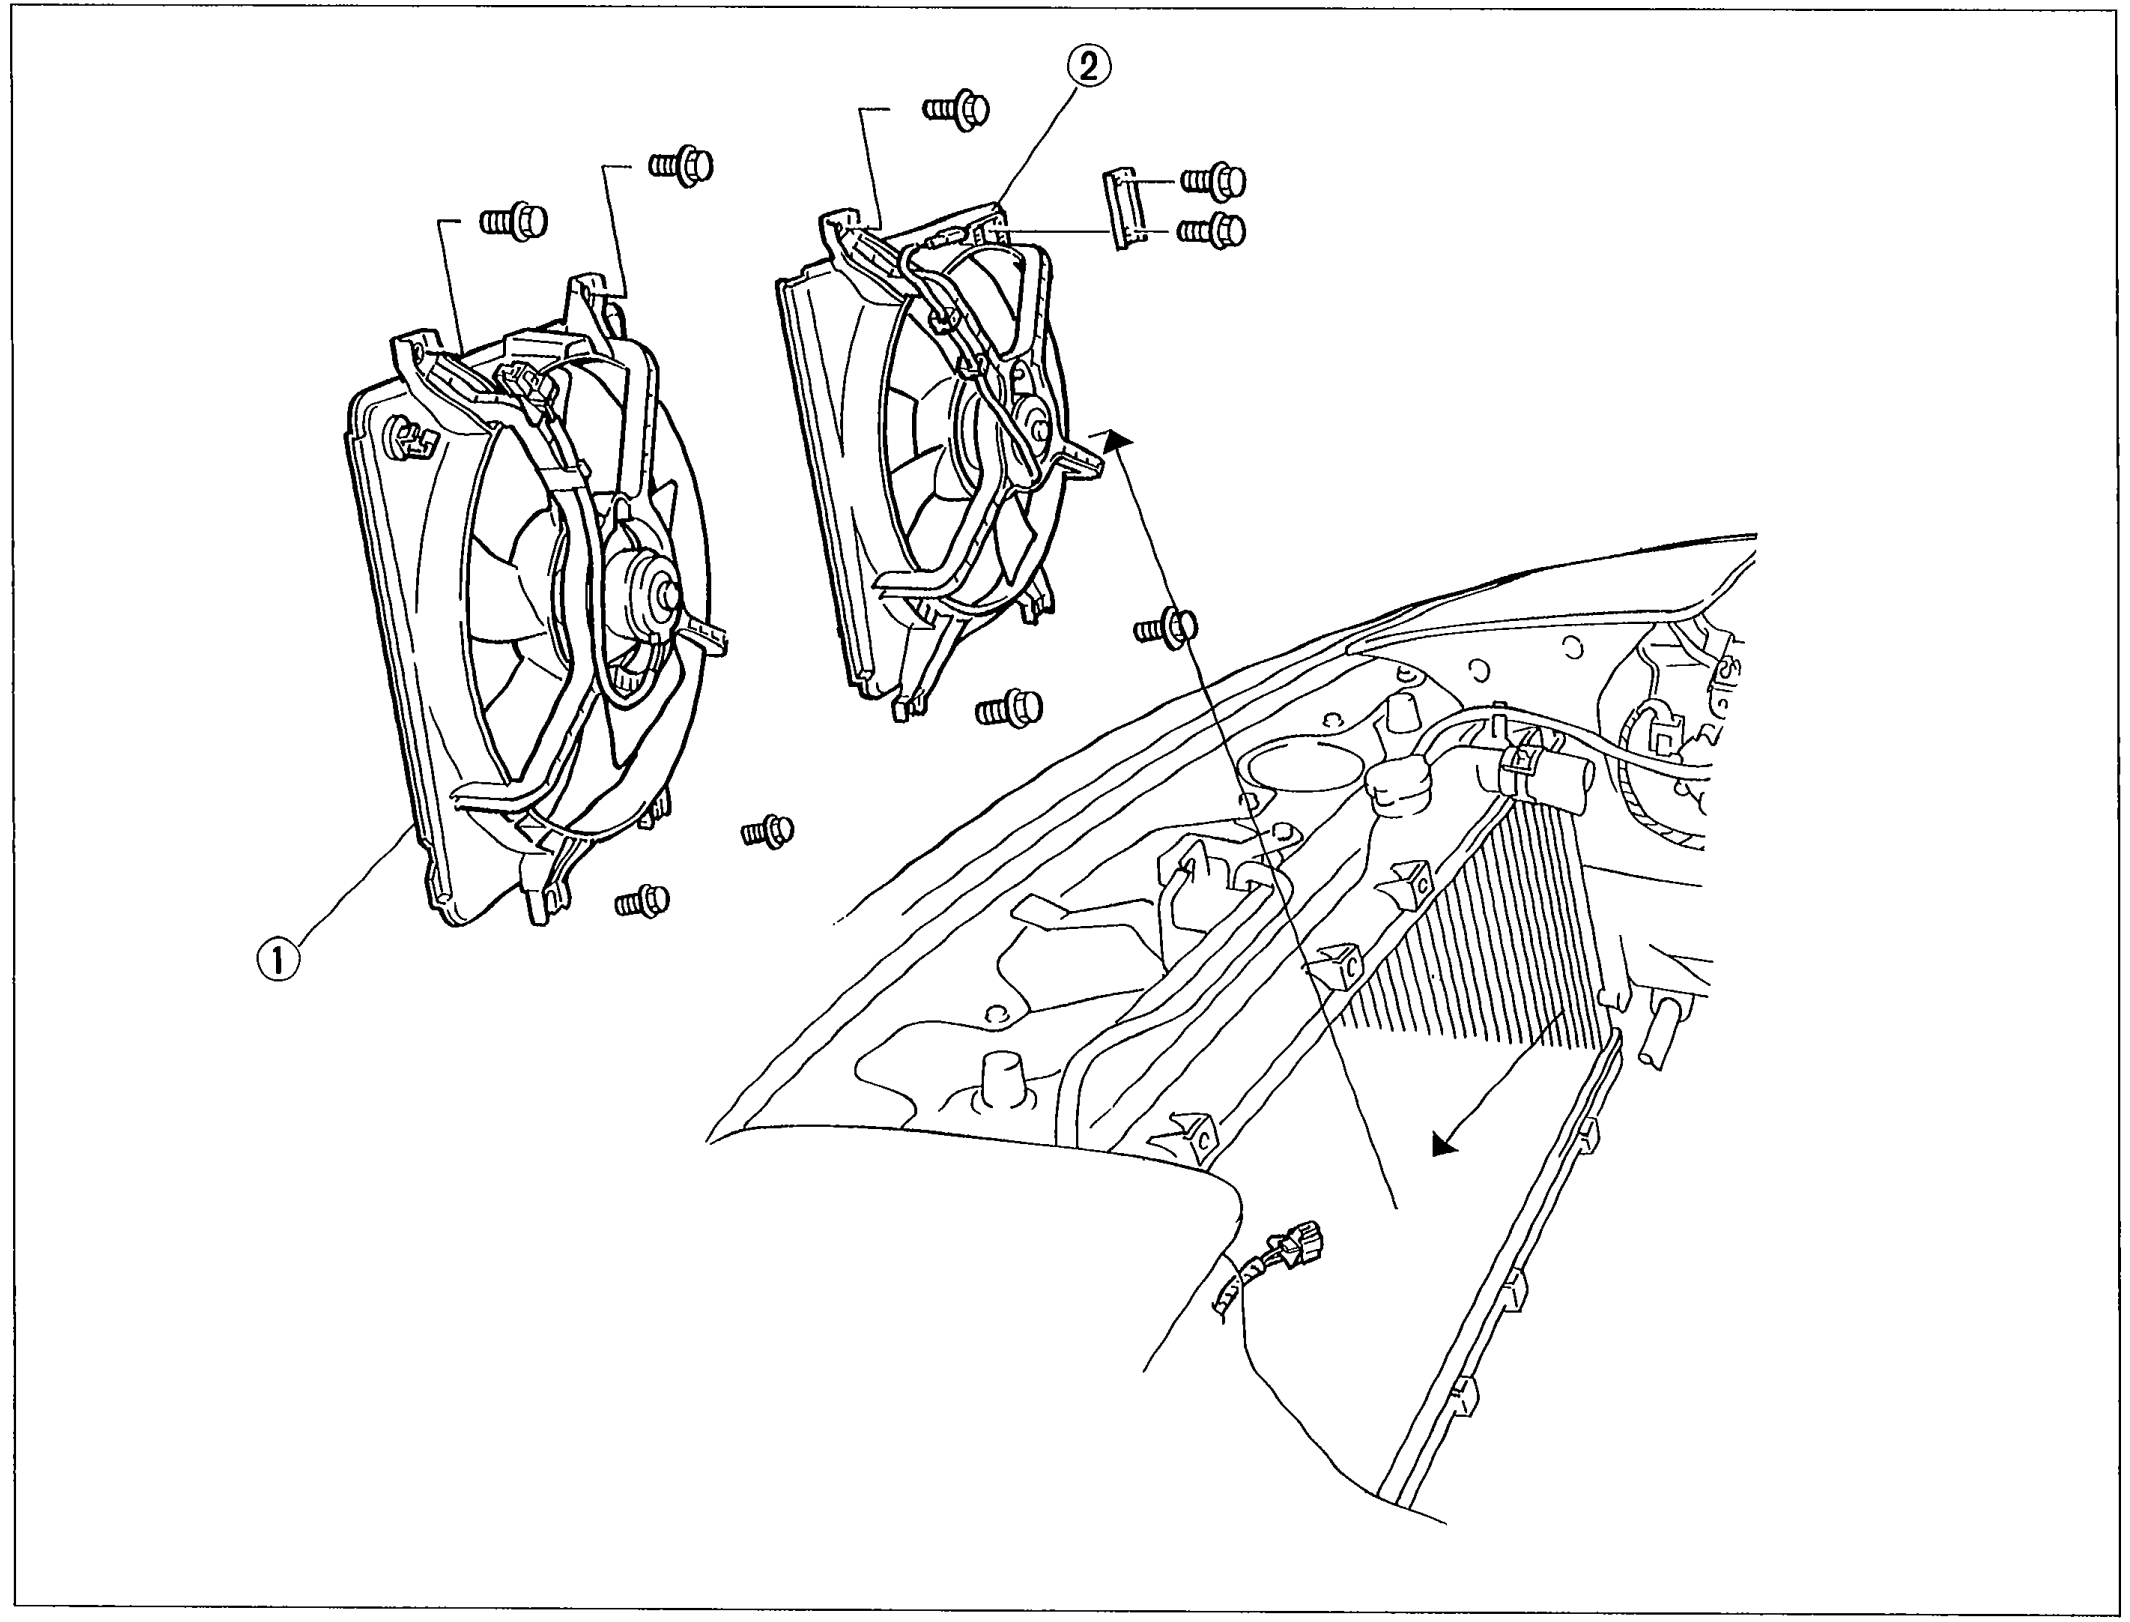 05U0UX-066
 - 5Install the condenser fan in the reverse order of removal.
Parts DiagramFig. fig1
Inspection
Condenser fan inspection
- 1Disconnect the condenser fan connector.
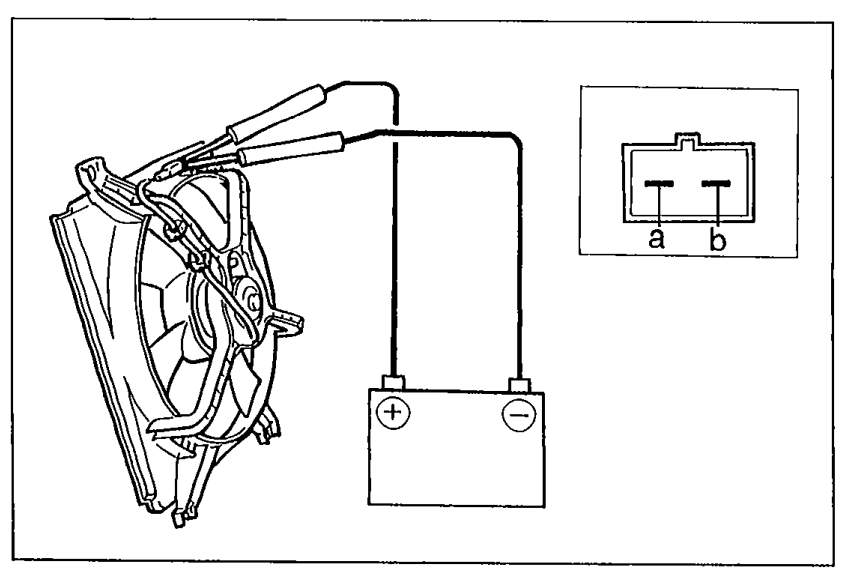 05U0UX-067
 - 2Verify that the condenser fan motor runs when connecting 12V to terminal a and grounding terminal b.
Condenser fan motor operation
a
Connection Groundb
Motor operationYes