
ASSEMBLY
B-63prose procedurePiston ring end gap positioning
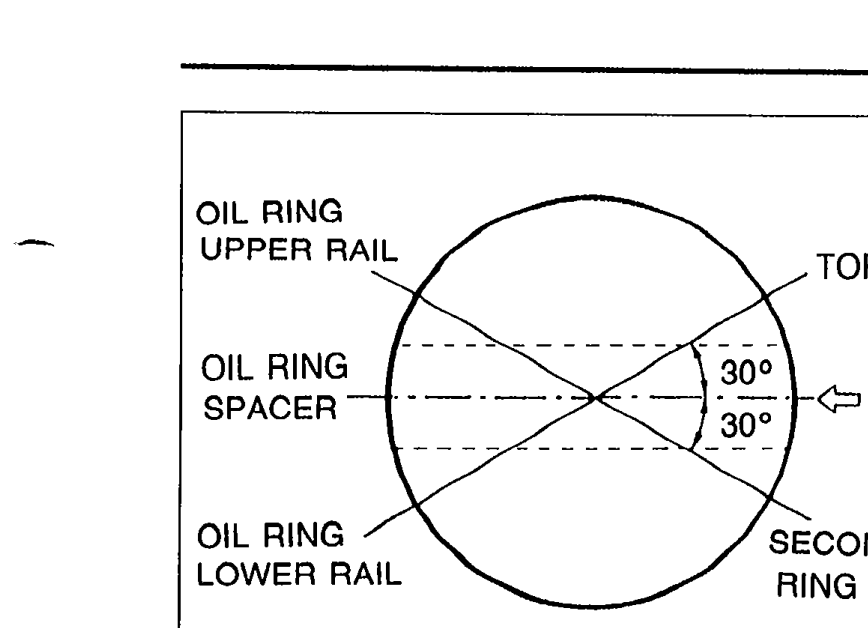
- 5Position the end gaps of the rings as shown in the figure.
 05U0BX-182
Oil Jet
Oil jet installation
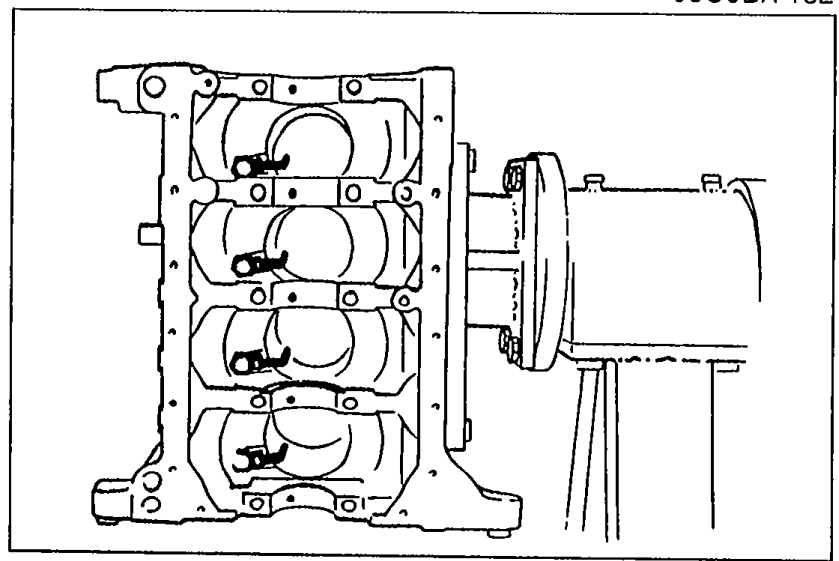
- 1Install the oil jets.
 05U0BX-183
| Specification | Value |
|---|---|
| Tightening torque (oil jet) | 12 - 18N·m |
Tightening torque (oil jet)
12 - 18N·m
Crankshaft
Crankshaft installation
- 1Before installing the crankshaft, inspect the main bearing oil clearances as follows.
Oil clearance inspection
Main bearing oil clearance
- 1Remove all foreign material and oil from the journals and bearings.
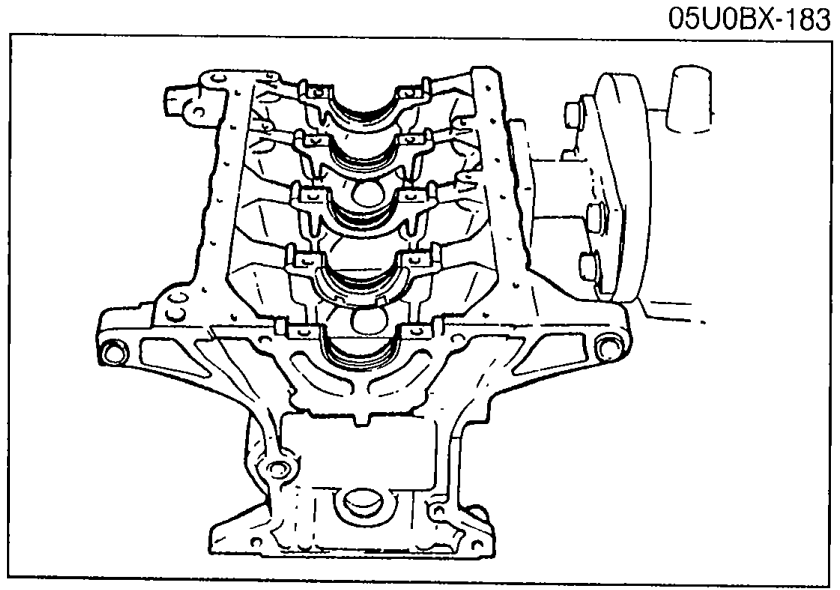
- 2Install the upper main bearings and thrust bearings.Install the grooved upper main bearings in the cylinder block.Install the thrust bearings with the oil groove facing the crankshaft.
 05U0BX-184
 - 3Set the crankshaft in the cylinder block.
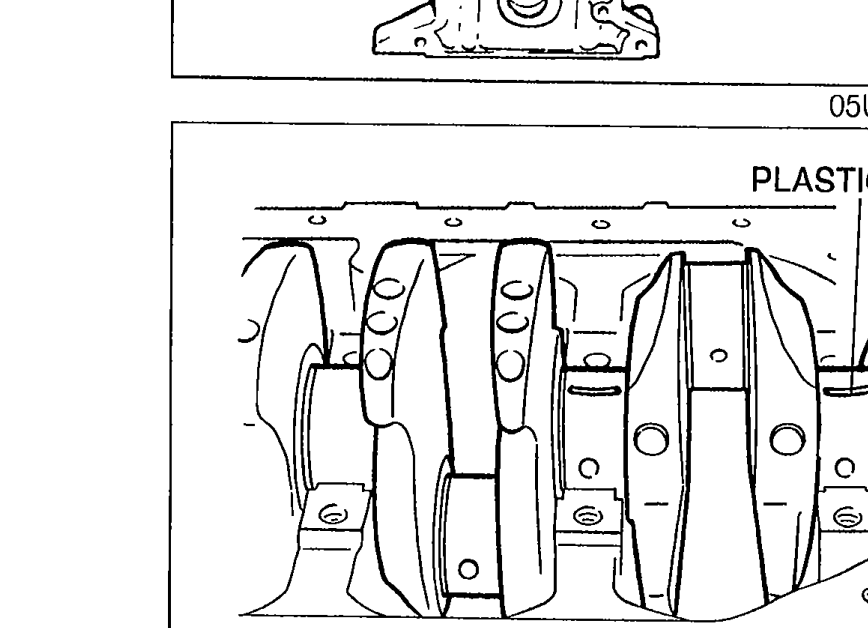
- 4Position Plastigage atop the journals in the axial direction.Do not rotate the crankshaft when measuring the oil clearances.
 05U0BX-185
 - 5Install the lower main bearings and the main bearing caps according to the cap number and ⇔ mark.
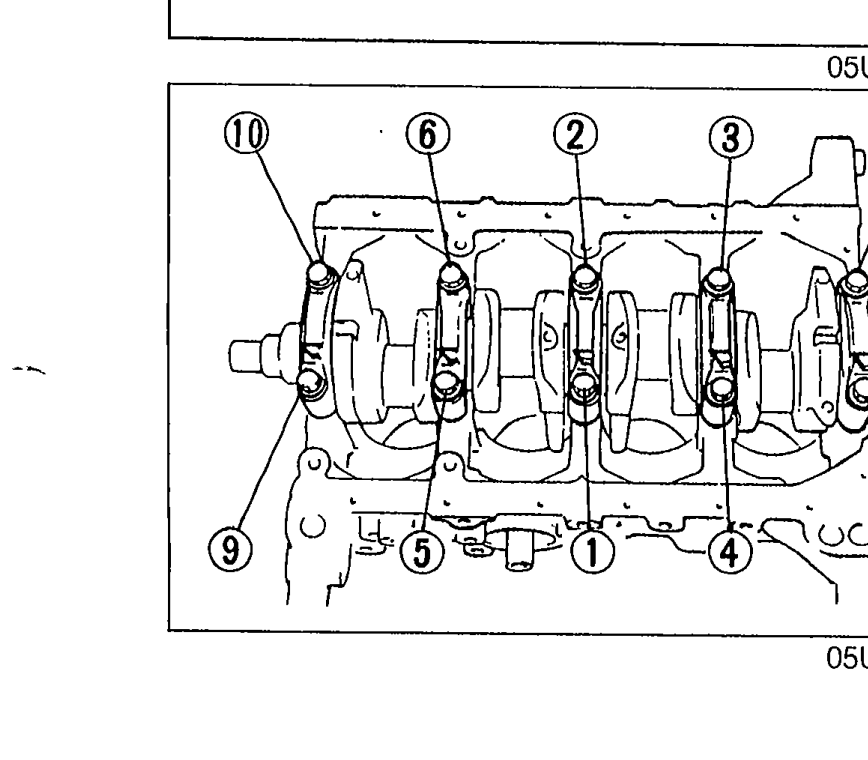 05U0BX-186
 - 6Tighten the main bearing cap bolts in two or three steps in the order shown in the figure.
| Specification | Value |
|---|---|
| Tightening torque (main bearing cap bolts) | 54 - 59N·m |
Tightening torque (main bearing cap bolts)
54 - 59N·m