
LIGHTING SYSTEM
T-47prose procedureStep 3
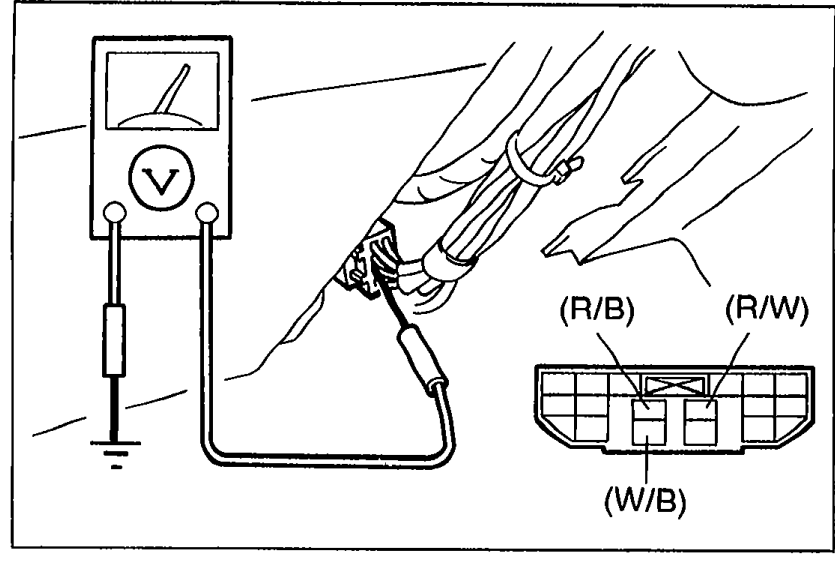
Step 3 — Headlight switch connector voltages
- 1Turn the headlight switch ON.
 05U0TX-088
 - 2Measure the voltage at the following terminal-wires of the headlight switch connector.
Step 3 — Headlight switch connector voltages
(W/B)
Headlight switch—
Voltage12V
ActionNext check wire (R/B)
(W/B)
Headlight switch—
Voltage0V
ActionRepair wire (W/B) (Headlight relay—Headlight switch)
(R/B)
Headlight switchLow beam
Voltage12V
ActionGo to Step 4
(R/B)
Headlight switchLow beam
Voltage0V
ActionReplace headlight switch
(R/W)
Headlight switchHigh beam
Voltage12V
ActionGo to Step 4
(R/W)
Headlight switchHigh beam
Voltage0V
ActionReplace headlight switch
Step 4
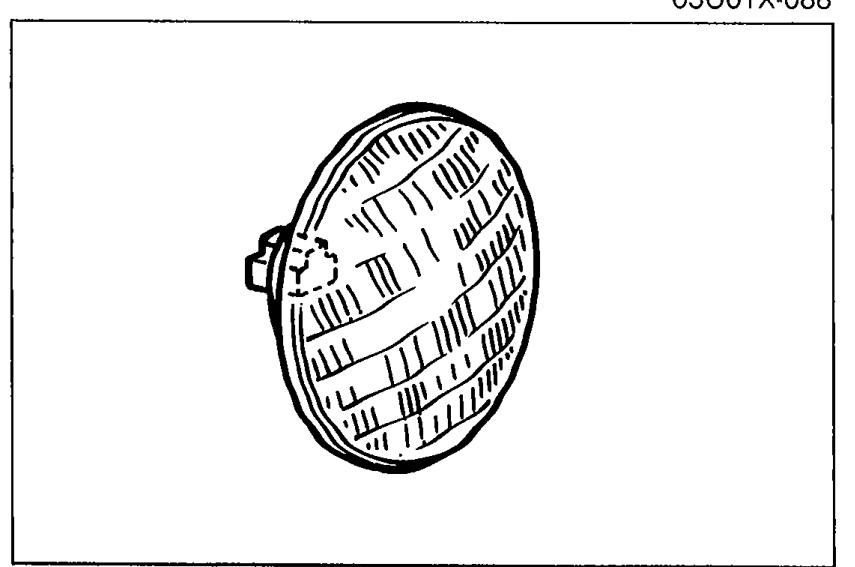
Step 4 — Check headlight bulbs
- 1Check the headlight bulbs.
 05U0TX-089
 - 2If a bulb is burned, replace it.
- 3If the bulbs are OK, go to Step 5.
Step 5
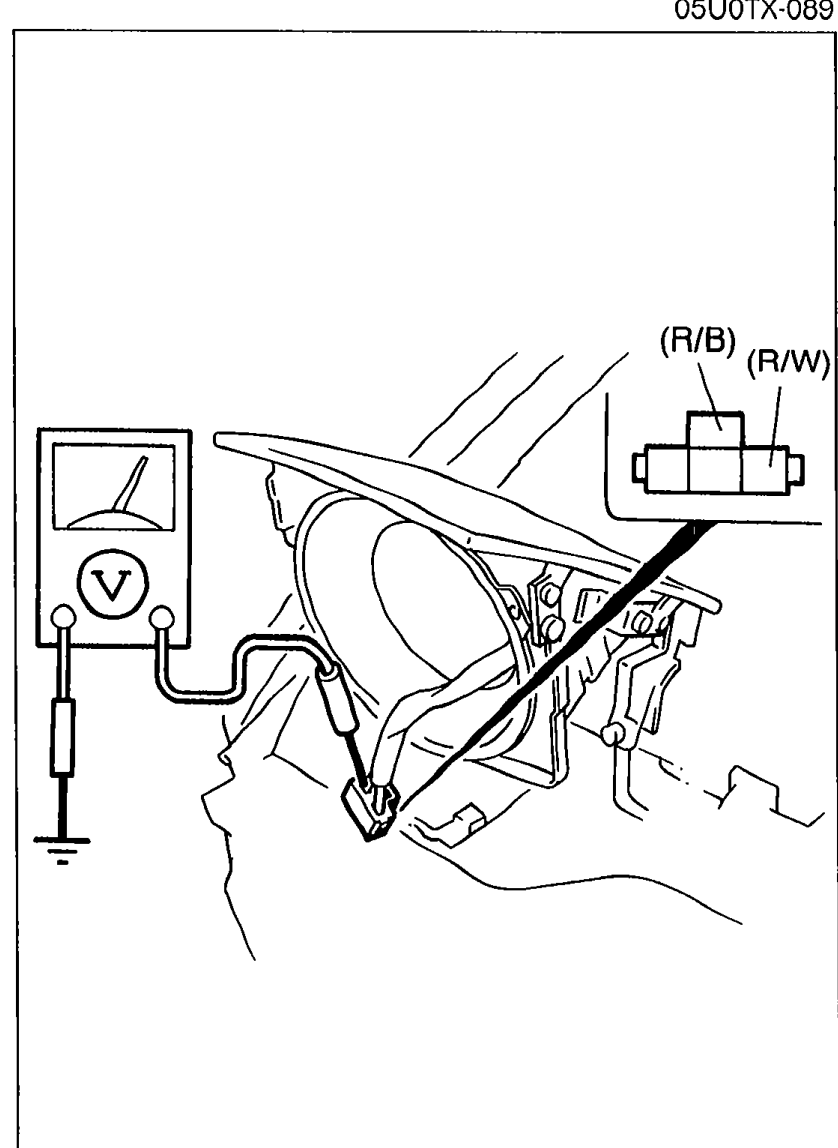
Step 5 — Disconnect headlight connectors and measure
- 1Disconnect the headlight connectors.
 05U0TX-090
 - 2Turn the headlight switch ON, and measure the voltage at the following terminal-wires as shown.
Step 5 — Headlight connector voltages and remedial action
Left
Wire(R/B)
Headlight switchLow beam
Voltage12V
Remedial ActionRepair ground wire (B)
Left
Wire(R/B)
Headlight switchLow beam
Voltage0V
Remedial ActionRepair wire (R/B) (Headlight switch—Headlight)
Left
Wire(R/W)
Headlight switchHigh beam
Voltage12V
Remedial ActionRepair ground wire (B)
Left
Wire(R/W)
Headlight switchHigh beam
Voltage0V
Remedial ActionRepair wire (R/W) (Headlight switch—Headlight)
Right
Wire(R/B)
Headlight switchLow beam
Voltage12V
Remedial ActionRepair ground wire (B)
Right
Wire(R/B)
Headlight switchLow beam
Voltage0V
Remedial ActionRepair wire (R/W) (Headlight switch—Headlight)
Right
Wire(R/W)
Headlight switchHigh beam
Voltage12V
Remedial ActionRepair ground wire (B)
Right
Wire(R/W)
Headlight switchHigh beam
Voltage0V
Remedial ActionRepair wire (R/W) (Headlight switch—Headlight)
Step 6
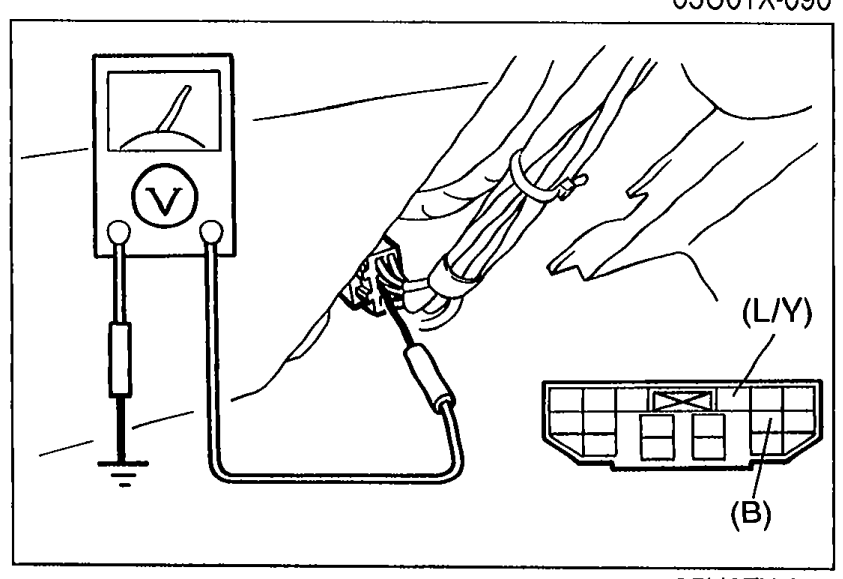
Step 6 — Headlight switch (combination switch) voltages
- 1Turn the headlight switch ON.
 05U0TX-091
 - 2Measure the voltage at the following terminal-wires of the headlight switch connector (in the combination switch).
Step 6 — Headlight switch connector voltages
(L/Y)
Voltage12V
ActionNext check wire (B)
(L/Y)
Voltage0V
ActionRepair wire (L/Y) (Headlight relay—Headlight switch)
(B)
Voltage12V
ActionRepair ground wire (B)
(B)
Voltage0V
ActionReplace headlight switch