
LIGHTING SYSTEM
T-49prose procedureStep 4
Step 4 — Measure headlight switch connector voltages
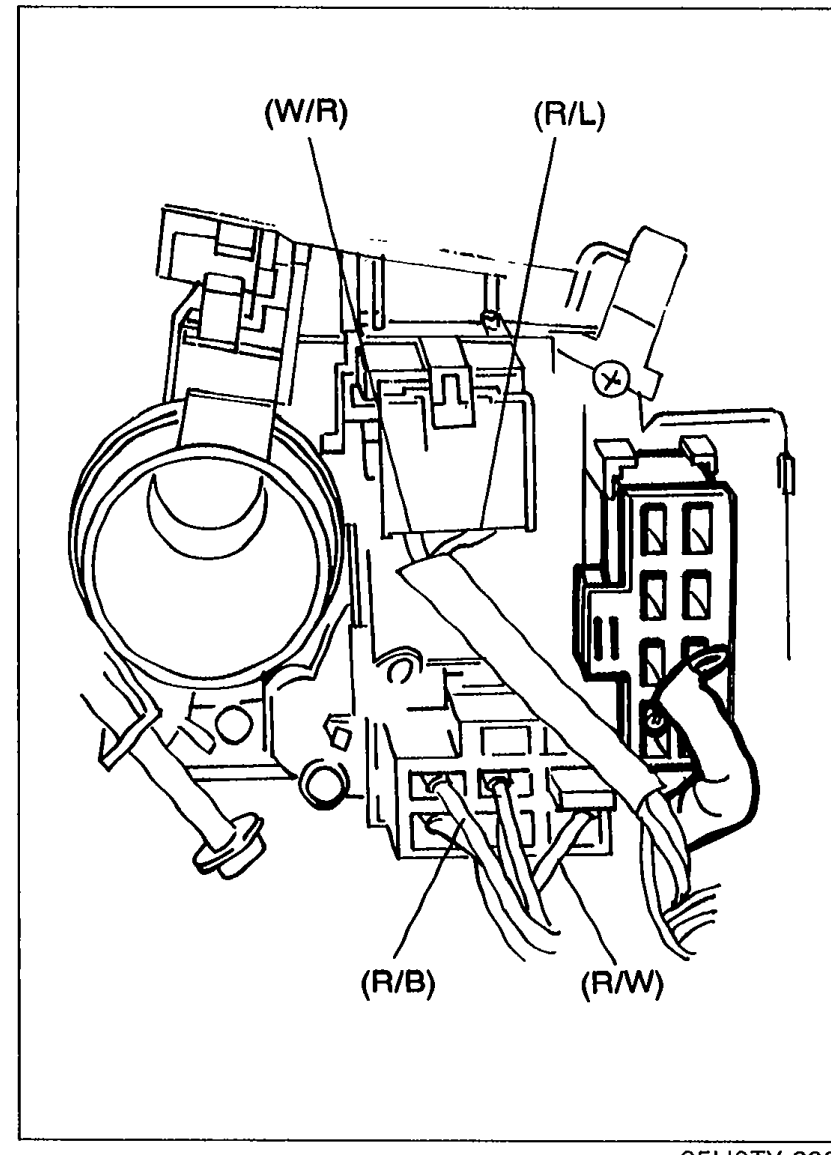
- 1Reconnect the headlight connector.
 05U0TX-299
 - 2Remove the column cover.
- 3Measure the voltage at the following terminal-wires of the headlight switch connectors (in the combination switch) as shown.
Step 4 — Headlight switch connector voltages
(R/L)
Headlight switchAny position
Voltage12V
ActionNext, check wire (W/R)
(R/L)
Headlight switchAny position
Voltage0V
ActionRepair wire (R/L) (HEAD 30A fuse—Headlight switch)
(W/R)
Headlight switchAny position
Voltage12V
ActionNext, check wire (R/W)
(W/R)
Headlight switchAny position
Voltage0V
ActionRepair wire (W/R) (BTN 40A fuse—Headlight switch)
(R/W)
Headlight switchON (High beam)
Voltage12V
ActionNext, check wire (R/B)
(R/W)
Headlight switchON (High beam)
Voltage0V
ActionGo to Step 5
(R/B)
Headlight switchON (Low beam)
Voltage12V
ActionCheck for poor connection of headlight switch connector
(R/B)
Headlight switchON (Low beam)
Voltage0V
ActionGo to Step 5
Step 5 — Headlight switch inspection
- 1Disconnect the headlight switch connectors.
 05U0TX-300
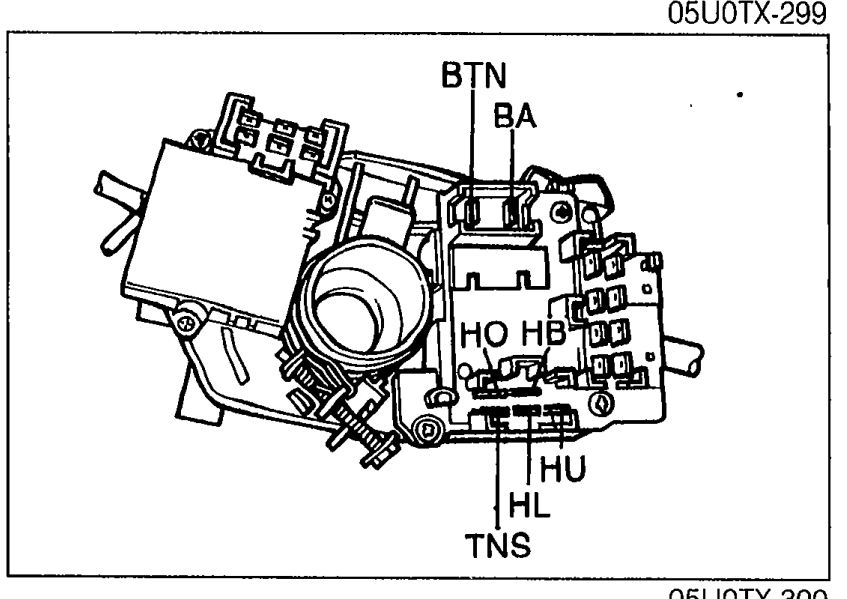
 - 2Check for continuity between terminals as shown with an ohmmeter.
- 3If not as specified, replace the headlight switch.
- 4If correct, check for a poor connection in the system.
Step 5 — Headlight switch continuity (O—O: Indicates continuity)
Headlight
PositionLow beam
HBO
HLO
HU
BA
BTN
TNS
Headlight
PositionHigh beam
HBO
HL
HUO
BA
BTN
TNS
Parking
Position
HB
HL
HU
BAO
BTN
TNSO
Tail, Parking
Position
HB
HL
HU
BA
BTNO
TNSO